Hamburger_menu.svg

FOR DEVELOPERS

How to Build a User-friendly UI Component: Android Customization

How to Build a User-friendly UI Component

Thanks to Android customization capabilities, developers can significantly enhance user experience. The UI is built with the help of hierarchical layouts and widgets. The main components include TextView, Buttons, Checkbox, ListView, Spinner, ProgressBar, Date Picker, Time Picker, etc.

If you are an Android developer, this article will be extremely helpful. We'll discuss user interface components in Android, with special emphasis on ListView and learn how to build it.

Android layout types and customization

The layout is a ViewGroup object/container that controls how child views will appear on the screen. Widgets are view object/UI components like buttons or text boxes.

There are many types of layouts, some of which are listed below:

  • AbsoluteLayout
  • FrameLayout
  • LinearLayout
  • RelativeLayout
  • TableLayout

AbsoluteLayout

AbsoluteLayout enables you to specify the exact location of its children, i.e., X and Y coordinates of its children with respect to the origin at the top left corner of the layout. It can be declared as:


<AbsoluteLayout
   android:layout_width=”fill_parent”
   android:layout_height=”fill_parent”
   xmlns:android=”http://schemas.android.com/apk/res/android” >
   
   <Button
      android:layout_width=”188dp”
      android:layout_height=”wrap_content”
      android:text=”Button”
      android:layout_x=”126px”
      android:layout_y=”361px” />
</AbsoluteLayout>

FrameLayout

FrameLayout is a placeholder designed to block out a specific area on the screen, which helps to display a single item. It should be used to hold a single child view. This is because it can be difficult to organize child views in a way that's scalable to different screen sizes without the children overlapping each other. You can, however, add multiple children to a FrameLayout and control their position within it by assigning gravity to each child using the android:layout_gravity attribute.

FrameLayout can be declared like below:


<?xml version=”1.0” encoding=”utf-8”?>
<FrameLayout
   android:layout_width=”wrap_content”
   android:layout_height=”wrap_content”
   android:layout_alignLeft=”@+id/lblComments”
   android:layout_below=”@+id/lblComments”
   android:layout_centerHorizontal=”true” >
   
   <ImageView
      android:src = “@drawable/droid”
      android:layout_width=”wrap_content”
      android:layout_height=”wrap_content” />
</FrameLayout>

LinearLayout

LinearLayout follows a horizontal and vertical layout, which means it arranges views in a single column or in a single row. Here’s the code for LinearLayout (vertical) which includes a text view:


<?xml version="1.0" encoding="utf-8"?>
<LinearLayout xmlns:android="http://schemas.android.com/apk/res/android"
    xmlns:tools="http:// schemas.android.com/tools"
    android:orientation="vertical"
    android:layout_width="match_parent"
    android:layout_height="match_parent"
    tools:context=".MainActivity">
    <EditText
        android:id="@+id/editText"
        android:layout_width="match_parent"
        android:layout_height="wrap_content"
        android:layout_margin="20dp"
        android:hint="Input"
        android:inputType="text"/>
    <Button
        android:id="@+id/showInput"
        android:layout_width="wrap_content"
        android:layout_height="wrap_content"
        android:layout_gravity="center_horizontal"
        android:text="Turing.com"
        android:textColor="@android:color/black"/>
    
</LinearLayout>

RelativeLayout

RelativeLayout enables you to specify how child views are positioned relative to each other. It can be declared as below:


<?xml version="1.0" encoding="utf-8"?>
<RelativeLayout xmlns:android="http://schemas.android.com/apk/res/android"
    android:layout_width="match_parent"
    android:layout_height="match_parent"
    android:padding="16dp">

    <ImageView
        android:id="@+id/image"
        android:layout_width="60dp"
        android:layout_height="60dp"
        android:src="@color/design_default_color_primary_dark" />
</RelativeLayout>

TableLayout

TableLayout groups views into rows and columns. It can be declared as:


<TableLayout
   xmlns:android=”http://schemas.android.com/apk/res/android”
   android:layout_height=”fill_parent”
   android:layout_width=”fill_parent” >
   
   <TableRow>
      <TextView
         android:text=”User Name:”
         android:width =”120dp”
         />
      
      <EditText
         android:id=”@+id/txtUserName”
         android:width=”200dp” />
   </TableRow>
   
</TableLayout>

Commonly used layout attributes

Following are some attributes that are applied when using layouts:

1. layout_marginLeft: It shows extra space on the left side of the View or ViewGroup.

2. layout_marginRight: It shows extra space on the right side of the View or ViewGroup.

3. layout_marginTop: It shows extra space on the top side of the View or ViewGroup.

4. layout_marginBottom: It shows extra space on the bottom side of the View or ViewGroup.

5. layout_width: It shows the width of the View or ViewGroup.

6. layout_height: It shows the height of the View or ViewGroup.

7. layout_weight: It shows the value of a view in terms of how much space it should occupy on the screen.

8. layout_gravity: It shows how child views are positioned.

Units of measurement and screen density in Android

Following are the units of measurement and screen density that are helpful when customizing Android.

- dp: Density-independent pixel. 1 dp is equivalent to one pixel on a 160-dpi screen.

- sp: Scale-independent pixel. This is similar to dp and is recommended for specifying font sizes.

- pt: A point is defined to be 1/72 of an inch, based on the physical screen size.

- px: Pixel, which corresponds to actual pixels on the screen.

- Low density (ldpi): 120 dpi.

- Medium density (mdpi): 160 dpi.

- High density (hdpi): 240 dpi.

- Extra High density (xhdpi): 320 dpi.

Example:

We will build a simple ListView customized UI. You will need to download Android Studio.

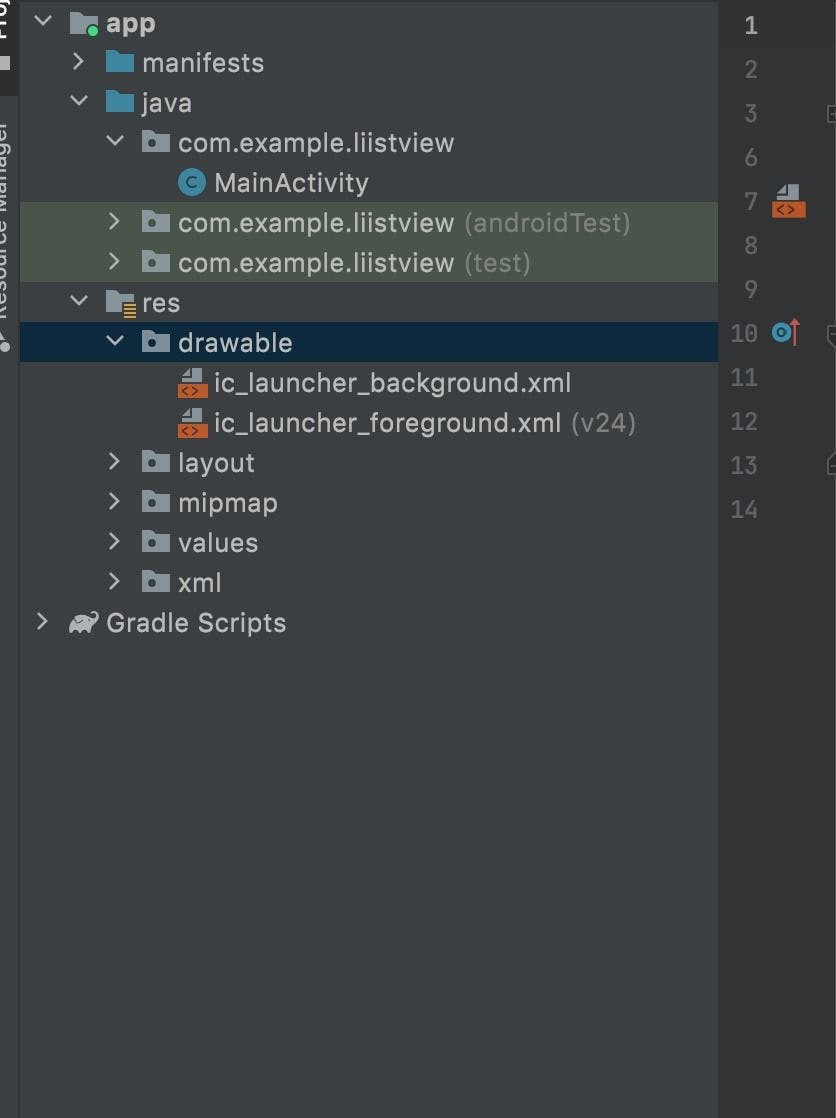
Click on app > res. Here, res defines the resources.

Resources are used in an application and comprise elements like images, layout files, string values, etc. Following are the folders that are present inside the res folder:

- Drawable: This is where we put all our graphics, vector images, and custom drawings.

- Layout: This helps to create screen layout files, for example, activity_main.xml.

- Mipmap: This is where we store the images used to make logos for the application.

- Values: This folder contains four default files: colors.xml, dimens.xml, strings.xml, and style.xml.

Steps for building ListView Android component

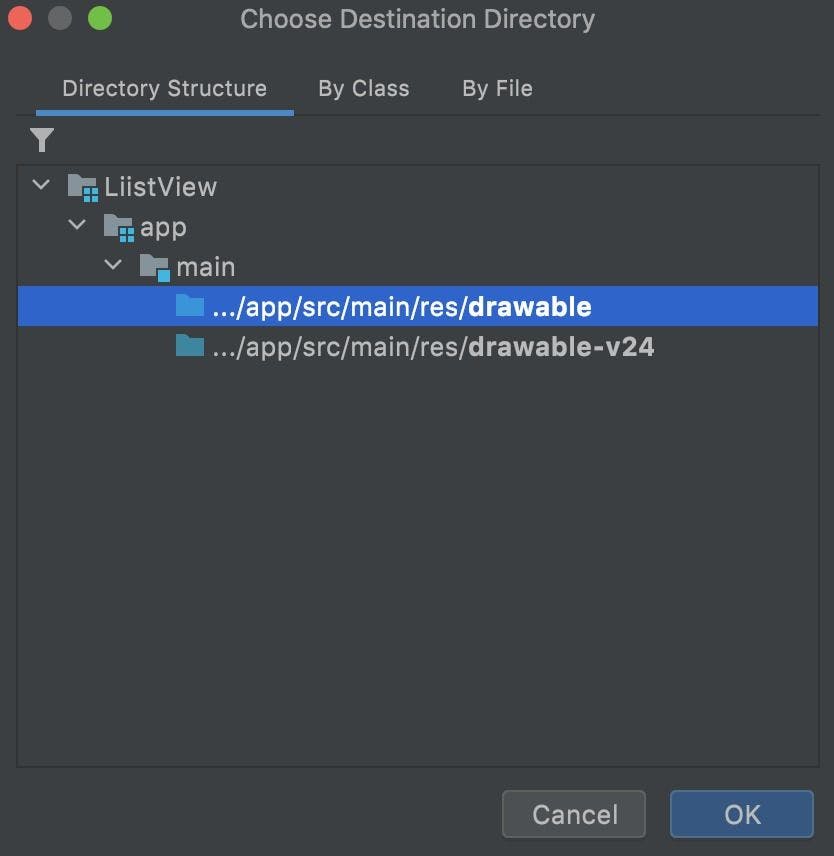
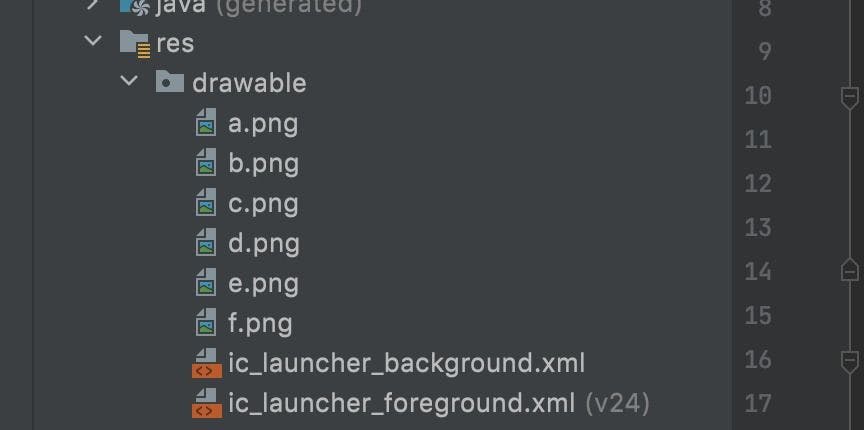
Step 1: Copy the images you have and paste them into the Drawable folder.

Steps for Android customization_5_11zon.webp

UI components in android_7_11zon.webp

User Interface components in android_8_11zon.webp

Step 2: Modify the default activity_main.xml file.


activity_main.xml 

<?xml version="1.0" encoding="utf-8"?>
<androidx.constraintlayout.widget.ConstraintLayout xmlns:android="http://schemas.android.com/apk/res/android"
   xmlns:app="http://schemas.android.com/apk/res-auto"
   xmlns:tools="http://schemas.android.com/tools"
   android:layout_width="match_parent"
   android:layout_height="match_parent"
   tools:context=".MainActivity">

   <ListView
       android:id="@+id/listView"
       android:layout_width="0dp"
       android:layout_height="0dp"
       app:layout_constraintBottom_toBottomOf="parent"
       app:layout_constraintEnd_toEndOf="parent"
       app:layout_constraintStart_toStartOf="parent"
       app:layout_constraintTop_toTopOf="parent" />

</androidx.constraintlayout.widget.ConstraintLayout>

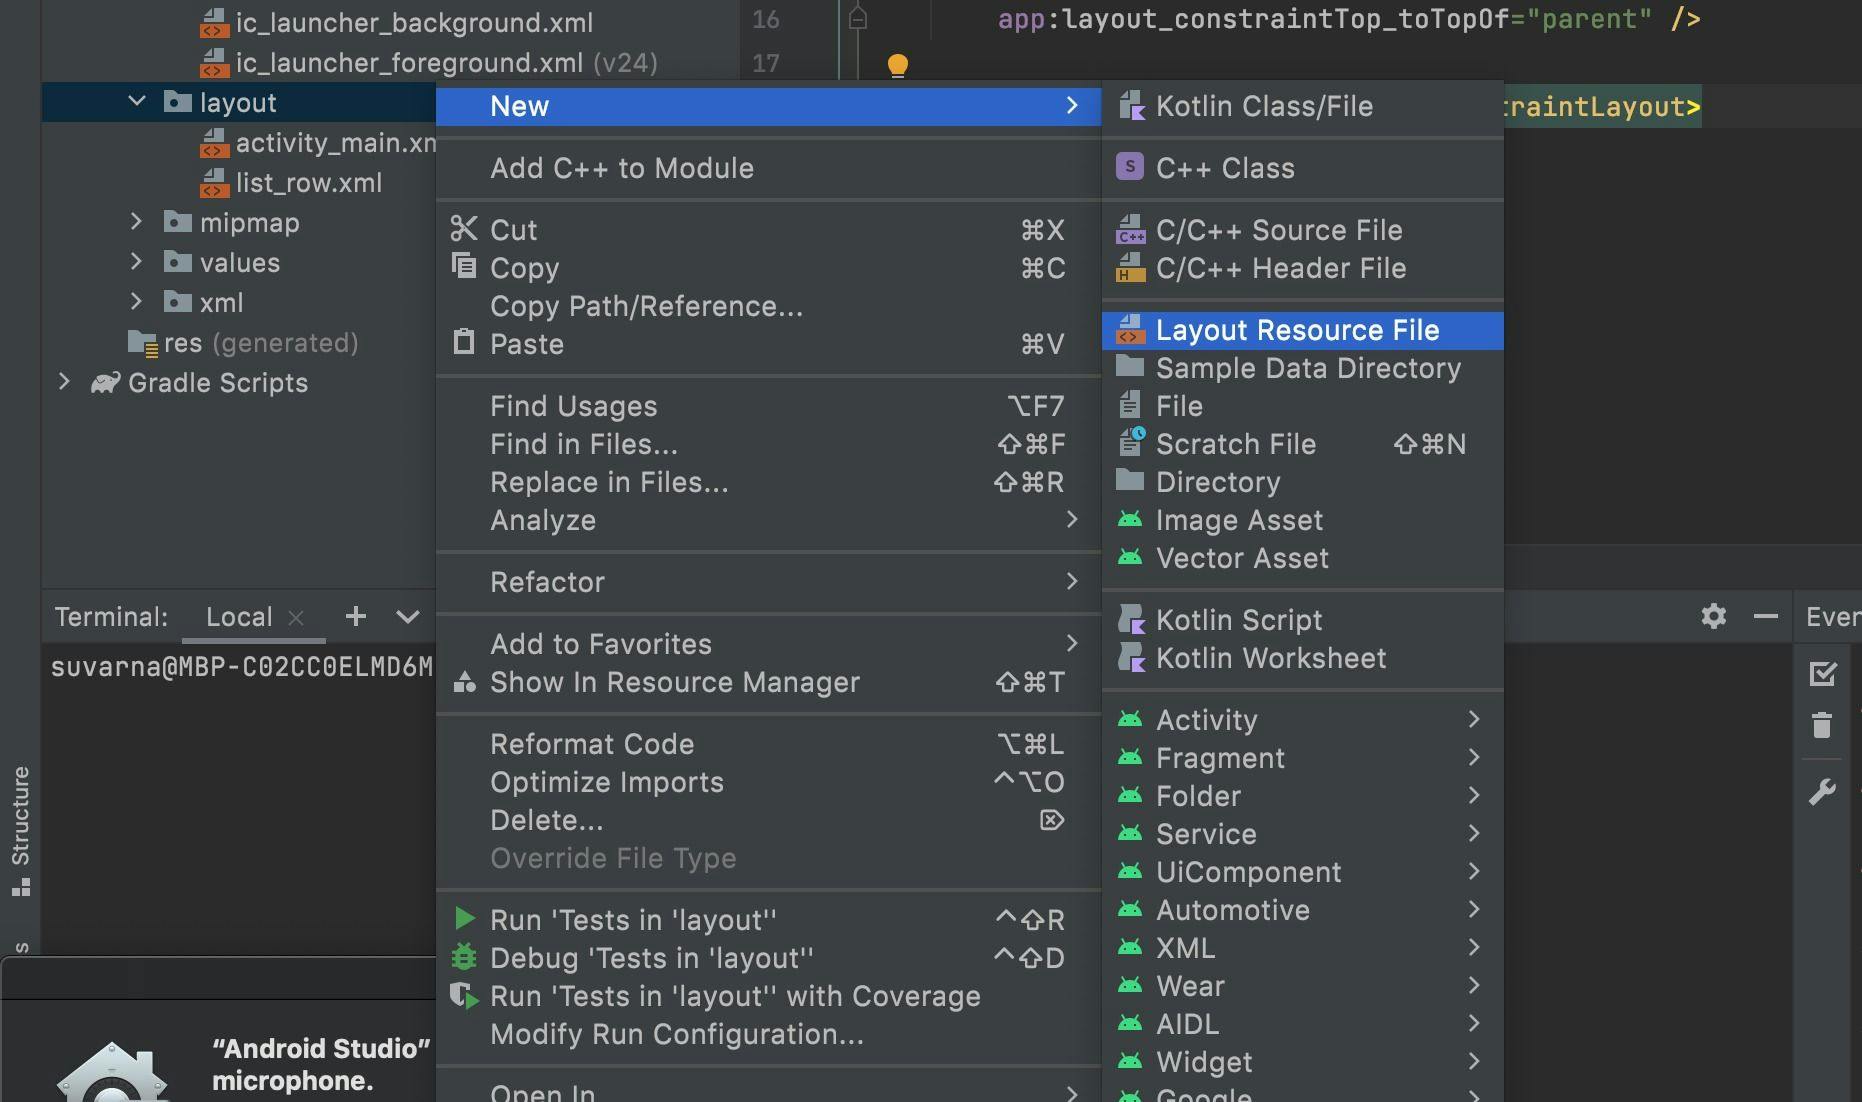
Step 3: Create a new resource layout file.

Steps for custom Android components_6_11zon.webp


list_row.xml

<?xml version="1.0" encoding="utf-8"?>
<RelativeLayout xmlns:android="http://schemas.android.com/apk/res/android"
   android:layout_width="match_parent"
   android:layout_height="match_parent"
   android:padding="16dp">

   <ImageView
       android:id="@+id/image"
       android:layout_width="60dp"
       android:layout_height="60dp"
       android:src="@color/design_default_color_primary_dark" />

   <TextView
       android:id="@+id/txtName"
       style="@style/TextAppearance.AppCompat.Title"
       android:layout_width="wrap_content"
       android:layout_height="wrap_content"
       android:layout_marginLeft="20dp"
       android:layout_toRightOf="@id/image"
       android:text="Name" />

   <TextView
       android:id="@+id/txtDes"
       style="@style/TextAppearance.AppCompat.Subhead"
       android:layout_width="wrap_content"
       android:layout_height="wrap_content"
       android:layout_below="@id/txtName"
       android:layout_marginLeft="20dp"
       android:layout_toRightOf="@id/image"
       android:maxLength="50"
       android:singleLine="true"
       android:text="Des" />


</RelativeLayout>

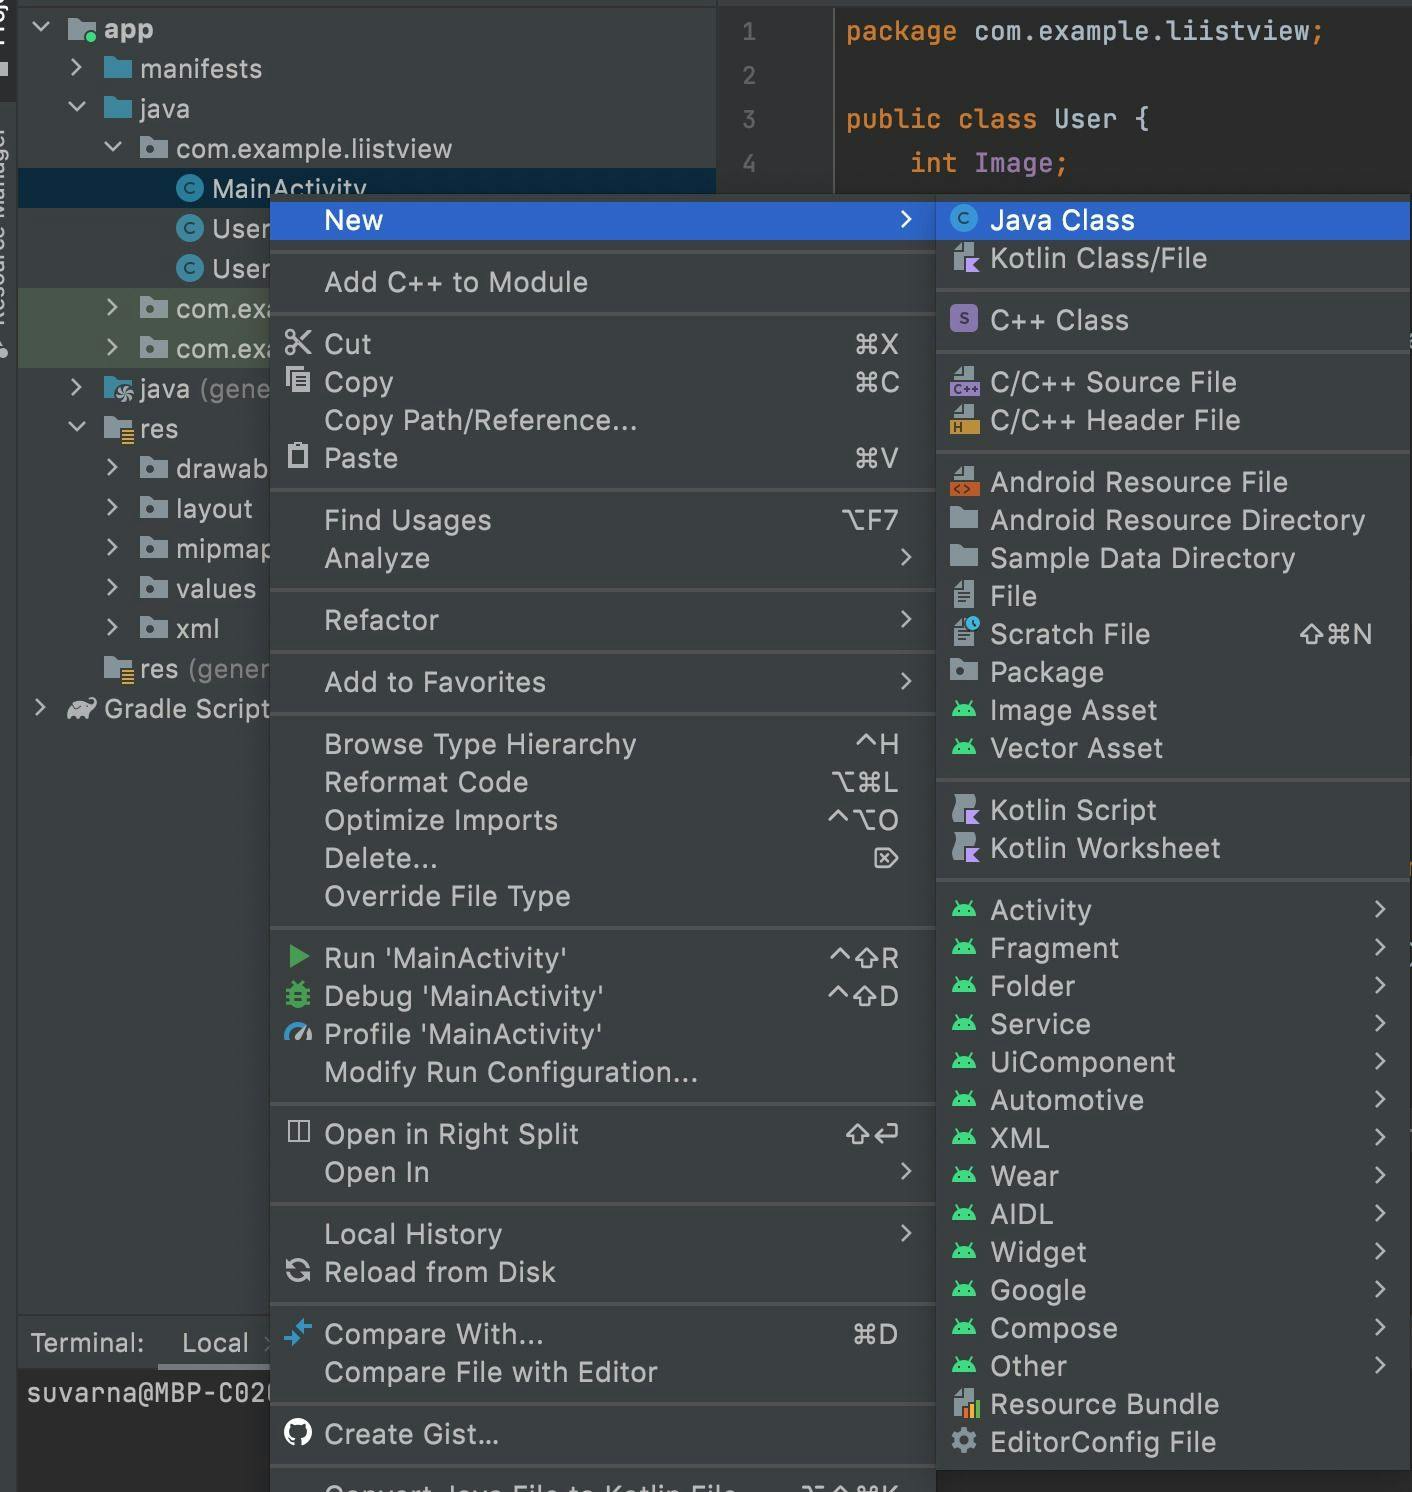
Step 4: Create a new Java file which will help create a user class.

How to build Android components_3_11zon.webp


User.java file

package com.example.liistview;

public class User {
   int Image;
   String Name;
   String Des;

   public User(int image, String name, String des) {
       Image = image;
       Name = name;
       Des = des;
   }

   public int getImage() {
       return Image;
   }

   public void setImage(int image) {
       Image = image;
   }

   public String getName() {
       return Name;
   }

   public void setName(String name) {
       Name = name;
   }

   public String getDes() {
       return Des;
   }

   public void setDes(String des) {
       Des = des;
   }
}

Step 5: Open your main Java file, .i.e, MainActivity.java.

User Interface components in android_8_11zon.webp


MainActivity.java

import android.widget.ListView;

import java.util.ArrayList;

public class MainActivity extends AppCompatActivity {

   ListView listView;

   @Override
   protected void onCreate(Bundle savedInstanceState) {
       super.onCreate(savedInstanceState);
       setContentView(R.layout.activity_main);

       listView = findViewById(R.id.listView);

       ArrayList<User> arrayList = new ArrayList <> ();

       arrayList.add(new User(R.drawable.a,"david", "I am david"));
       arrayList.add(new User(R.drawable.b,"Jenny", "I am Jenny"));
       arrayList.add(new User(R.drawable.c,"Tom", "I am Tom"));
       arrayList.add(new User(R.drawable.d,"Kia", "I am kia"));
       arrayList.add(new User(R.drawable.e,"Andro", "I am Andro"));
       arrayList.add(new User(R.drawable.f,"Moni", "I am moni"));

                 *************Adapters are remaining***********

Note: The file does not contain the whole code as the adapters are yet to be implemented.

Step 6: Create the Adapter file.


UserAdapter.java

package com.example.liistview;

import android.content.Context;
import android.view.LayoutInflater;
import android.view.View;
import android.view.ViewGroup;
import android.widget.ArrayAdapter;
import android.widget.ImageView;
import android.widget.TextView;

import androidx.annotation.NonNull;
import androidx.annotation.Nullable;

import java.util.ArrayList;

public class UserAdapter extends ArrayAdapter<User> {

   private Context mContext;
   private int mResource;


   public UserAdapter(@NonNull Context context, int resource, @NonNull ArrayList<User> objects) {
       super(context, resource, objects);
       this.mContext = context;
       this.mResource = resource;

   }

   @NonNull
   @Override
   public View getView(int position, @Nullable View convertView, @NonNull ViewGroup parent) {
       LayoutInflater layoutInflater = LayoutInflater.from(mContext);

       convertView = layoutInflater.inflate(mResource,parent,false);

       ImageView imageView = convertView.findViewById(R.id.image);

       TextView txtName = convertView.findViewById(R.id.txtName);

       TextView txtDes = convertView.findViewById(R.id.txtDes);

       imageView.setImageResource(getItem(position).getImage());
       txtName.setText(getItem(position).getName());
       txtDes.setText(getItem(position).getDes());


       return convertView;

   }
}

Step 7: Add the adapter in the MainActivity.java file.

The entire code for MainActivity.java file is:


package com.example.liistview;
import androidx.appcompat.app.AppCompatActivity;

import android.os.Bundle;
import android.widget.ListView;

import java.util.ArrayList;

public class MainActivity extends AppCompatActivity {

   ListView listView;

   @Override
   protected void onCreate(Bundle savedInstanceState) {
       super.onCreate(savedInstanceState);
       setContentView(R.layout.activity_main);

       listView = findViewById(R.id.listView);

       ArrayList<User> arrayList = new ArrayList <> ();

       arrayList.add(new User(R.drawable.a,"david", "I am david"));
       arrayList.add(new User(R.drawable.b,"Jenny", "I am Jenny"));
       arrayList.add(new User(R.drawable.c,"Tom", "I am Tom"));
       arrayList.add(new User(R.drawable.d,"Kia", "I am kia"));
       arrayList.add(new User(R.drawable.e,"Andro", "I am Andro"));
       arrayList.add(new User(R.drawable.f,"Moni", "I am moni"));

       UserAdapter userAdapter = new UserAdapter(this,R.layout.list_row,arrayList);
       listView.setAdapter(userAdapter);


   }
}

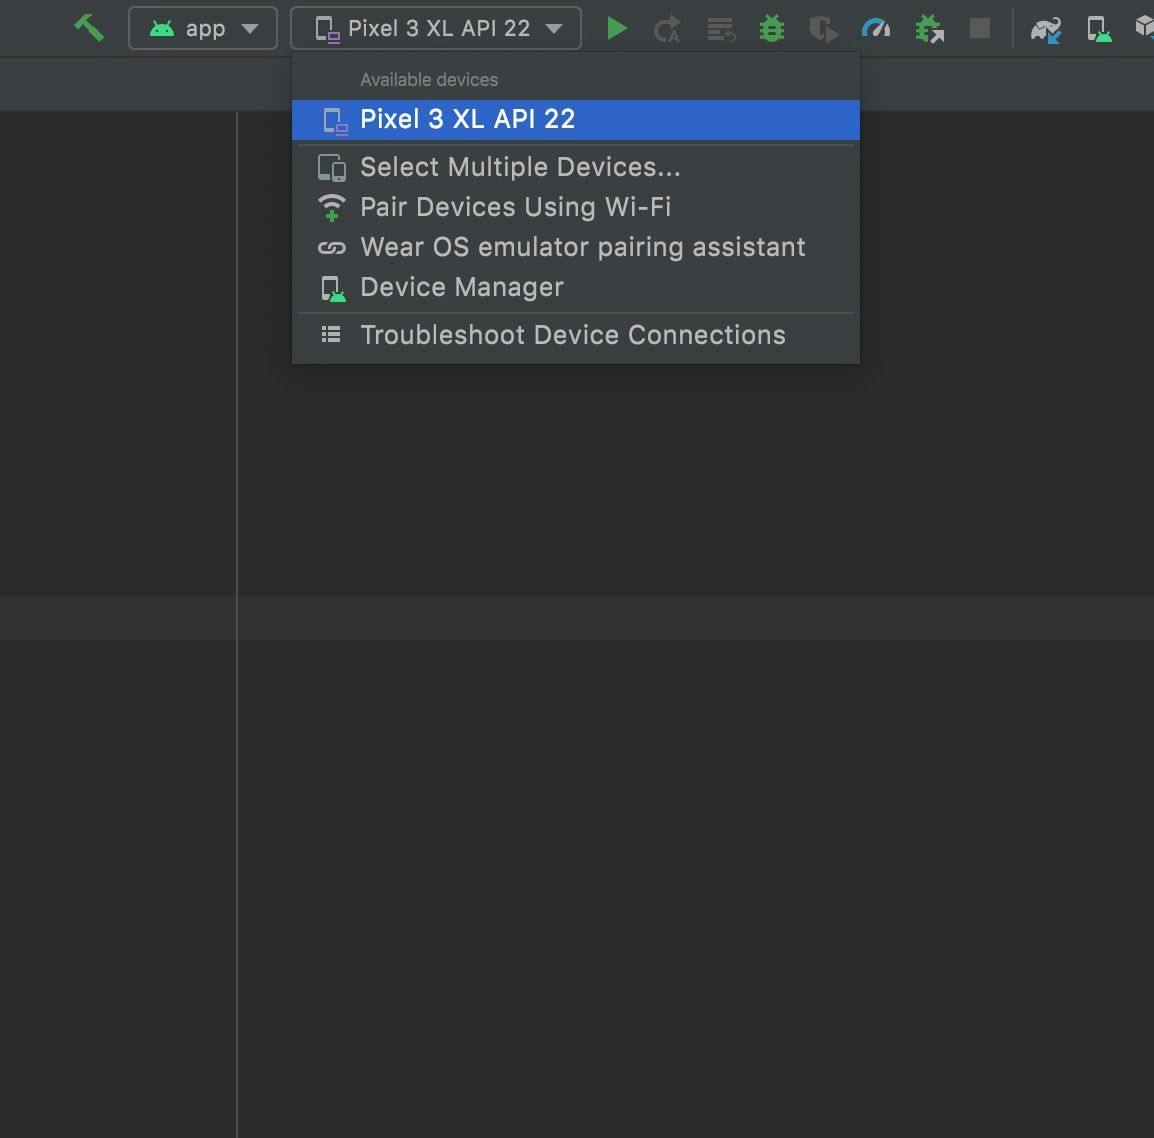
Step 8: Run your file.

Select where you want to run your device and click on the ‘run’ button.

Customizing Android components_2_11zon.webp

Final output:

Output of Android customization_4_11zon.webp

As discussed, there are many customizable user interface components in Android such as Checkbox, Spinner, TextView, etc. This article highlights ListView. Try implementing these steps for first-hand experience in building a custom ListView before trying out the other components.

FAQs

1: How to create custom Android UI components?

Ans: Here are the steps to create custom Android UI components:
Step 1: Create an XML layout.
Step 2: Based on your layout, derive the component class from the parent component.
Step 3: Add logic for components, and use attributes to enable users to modify the component’s behavior.

2: Can you customize Android UI?

Ans: Yes, you can customize the Android UI inherently by inheriting an existing component. For example, a CircleImageView that inherits ImageView.

3: What are the UI components of Android applications?

Ans: The UI components of Android applications are as follows:

- Activities: Used to handle user interaction/activity on screen. For example, the Contacts application on a mobile phone has one act that displays all contacts. Another activity would be to add/delete a contact number.

- Broadcast receivers: Used to handle communication between Android OS and applications. For example, applications can initiate broadcasts to let other applications know that some data has been downloaded to the device and is available for them to use.

- Content providers: Used to handle data and database management issues.

- Fragments: Part of an activity. It is also called a sub-activity. It is used to represent multiple screens inside one activity.

- Intents: The message that passes between the different components like activities, content providers, broadcast receivers, services, etc. It uses the startActivity() method to invoke an activity, broadcast receivers, etc.

- Layouts: They define the structure of a UI in an app.

- Manifest: Used to define the structure and metadata of the application. Every project in Android includes a manifest file as AndroidManifest.xml to be stored in the root directory of its project hierarchy.

- Resources: Includes external elements like strings, constants, and drawable pictures.

- Services: Handles background processing associated with an application. For example, performing background operations like handling network transactions or playing music.

- Views: Occupies a rectangular area on the screen and is responsible for drawing and event-handling like buttons, lists forms, etc.

Press

Press

What’s up with Turing? Get the latest news about us here.
Blog

Blog

Know more about remote work. Checkout our blog here.
Contact

Contact

Have any questions? We’d love to hear from you.

Hire remote developers

Tell us the skills you need and we'll find the best developer for you in days, not weeks.