Top 100 Selenium interview questions and answers for 2024
If you want to work as a successful Selenium developer for a top Silicon Valley firm or build a team of talented Selenium developers, you've come to the right spot. We've carefully compiled a list of Selenium developer interview questions for your Selenium interview to give you an idea of the kind of Selenium interview questions you can ask or be asked.
Are you preparing for a job interview in Selenium? Do you want to ace that interview and showcase your skills and knowledge of Selenium? Look no further! In this blog post, we have compiled a list of the Top 100 Selenium interview questions and answers just for you.
Whether you are a novice or an experienced professional, these advanced and basic interview questions cover a wide range of topics related to Selenium automation, including tricky questions, testing concepts, and framework implementation.
As Selenium is one of the most popular tools for web automation testing, it's crucial to be well-prepared for any interview in this field. This comprehensive guide will help you understand the key concepts and techniques used in Selenium testing, ensuring you have the confidence to answer any question that comes your way.
By familiarizing yourself with these Selenium interview questions and answers, you can enhance your chances of landing your dream Selenium developer job.
Table of contents
Basic Selenium interview questions and answers (23)Intermediate Selenium interview questions and answers (48)Advanced Selenium interview questions and answers (29)Basic Selenium interview questions and answers
1.
What is Selenium? Explain its advantages.
Selenium is an open-source automation testing tool widely used for web application testing. It allows users to write test scripts in various programming languages like Java, Python, and C#. Selenium provides a set of APIs and libraries to interact with web browsers, enabling testers to simulate user actions and automate repetitive tasks.
Advantages of using Selenium include:
- Cross-browser compatibility: Selenium supports multiple browsers like Chrome, Firefox, and Safari, ensuring your web application works consistently across platforms.
- Platform independence: Selenium is compatible with different operating systems, allowing testers to write and execute tests on various platforms.
- Language support: Selenium supports multiple programming languages, providing flexibility for developers and testers.
- Extensibility: Selenium's modular architecture allows users to extend its functionality by integrating with other frameworks or tools.
- Community Support: Being an open-source tool, Selenium has a large and active community, offering extensive documentation, forums, and support.
2.
What are the different forms of Selenium?
There are three different forms of Selenium: Selenium IDE, Selenium WebDriver, and Selenium Grid.
- Selenium IDE (Integrated Development Environment) is a Firefox plugin that is used to record and playback user actions. It is primarily used for simple testing tasks and is well-suited for beginners.
- Selenium WebDriver is a web automation framework that supports multiple programming languages such as Java, Python, and Ruby. It provides a more advanced and flexible approach to automation testing and allows developers to automate complex web-based testing scenarios.
- Selenium Grid is a tool that enables simultaneous testing of multiple web applications across different devices and browsers. It allows testers to execute tests on a centralized hub and distribute them across different nodes for faster execution.
3.
How do you handle iframes in Selenium WebDriver?
To handle iframes in Selenium WebDriver, you need to first switch the context to the iframe. This can be done using the switchTo() method provided by WebDriver. You can switch to the iframe either by its name or ID, or by locating an element within the iframe.
Once the context is switched, you can interact with the elements within the iframe as you would with a regular web page. To switch back to the parent window or default content, you can use the defaultContent() method.
It's important to note that iframes can sometimes cause synchronization issues with WebDriver, as it may not wait for the content to load fully before switching contexts. Therefore, it's recommended to add explicit waits or use a framework like Page Object Model to handle iframes.
4.
What are some limitations of Selenium?
Selenium, while being an immensely powerful tool for web automation, does come with certain limitations that are important to acknowledge:
- Browser Execution Speed: While Selenium supports multiple browsers, execution speed can vary between them. Some operations may perform slower on one browser compared to another, which can impact overall test runtime.
- Setup Complexity: Setting up Selenium can be intricate, especially for those new to automation or programming. It requires understanding WebDriver, configuring browser drivers, and integrating with testing frameworks.
- Lack of Built-In Reporting & Test Management: Selenium itself doesn't offer built-in reporting or test management features. Integrating with third-party tools like TestNG or Allure for reporting and test orchestration is often necessary.
- Web-Focused: Selenium specializes in web applications. While it can handle mobile web testing, for native or hybrid mobile apps, one would need to integrate with frameworks like Appium that expand Selenium's capabilities to mobile.
- Handling Dynamic Content: Selenium might struggle with handling highly dynamic web content, where elements are constantly changing or loading asynchronously. In such cases, incorporating waits and synchronization techniques are crucial but can complicate script development.
- Maintenance Overhead: Automated tests require maintenance as applications evolve. Selenium tests can be particularly sensitive to changes in the web application’s interface, requiring frequent updates to test scripts.
5.
Which browsers/drivers are supported by Selenium Webdriver?
Selenium WebDriver provides support for the following browsers, each with its specific driver that facilitates communication between your tests and the browser:
- Google Chrome: Supported by ChromeDriver.
- Mozilla Firefox: Supported by GeckoDriver.
- Safari: Comes with its own built-in WebDriver support since Safari 10.
- Microsoft Edge: Supported by EdgeDriver.
- Internet Explorer: Although Internet Explorer is largely obsolete, Selenium still supports it through the Internet Explorer Driver; however, its usage is generally discouraged due to security concerns and Microsoft's shift toward Edge.
Each browser driver acts as a bridge between the Selenium WebDriver and the browser itself. It is crucial to download and maintain the driver version that is compatible with the version of the browser you are testing on to prevent any disruption in test execution.
6.
What is Selenium 4 and how is it different from other Selenium versions?
Selenium 4 is the most recent update to the Selenium test automation framework, and it introduces a number of key enhancements and features that distinguish it from earlier versions, such as W3C WebDriver Standard Compliance, Improved Debugging and Observability, Enhanced Selenium Grid, Support for Chrome DevTools Protocol, Additional Locator Strategies, Native Support for Mobile Testing with Appium, Modular Grid Architecture, among others.
Selenium 4 is poised to offer a more current, robust, and flexible automation testing experience with its range of new features and functionalities, making it a significant upgrade over earlier versions of the framework. Users updating from previous versions would benefit from the improved capabilities but may need to make a few minor updates to test code and infrastructure to take full advantage of the new features.
7.
What are some features of Selenium 4?
Selenium 4 introduces several new features and enhancements. Some of the notable features include:
- W3C WebDriver Standard Compliance: Selenium 4 conforms fully to the W3C WebDriver standard, which unifies the driver and browser communication protocol. This ensures more consistent behavior and compatibility across different browsers, as well as better integration with modern web development and testing practices.
- Improved Debugging and Observability: The introduction of more comprehensive logging and better exception handling greatly facilitates debugging. The new version also offers a richer and more actionable set of error messages that includes screenshots to help diagnose issues promptly.
- Enhanced Selenium Grid: The Selenium Grid, which allows for parallel and remote test executions, has better UI and diagnostics. Moreover, it supports full Docker integration, simplifying the infrastructure setup for distributed testing.
- Support for Chrome DevTools Protocol: Selenium 4 leverages the Chrome DevTools Protocol (CDP) allowing testers to perform a more refined and in-browser series of tests for performance, network conditions simulation, accessibility, and other browser attributes.
- Additional Locator Strategies: The addition of new locator strategies like relative locators (formerly known as "friendly locators") provides more natural language expressions for identifying elements based on their position relative to others e.g., above, below, to the left of, etc.
- Native Support for Mobile Testing with Appium: Selenium 4's improved support for mobile testing is facilitated by native integrations with Appium, directly supporting mobile browser and application testing across a variety of platforms.
- Modular Grid Architecture: The new Selenium Grid 4 architecture is modular, which enhances scalability and the ability to manage the individual components for distributed test execution separately.
- Revamped IDE: Selenium IDE, the record and playback tool, now comes with more robust cross-browser support and modern features like playback control, easier test case debugging, and a structured command interface.
- Bi-directional Communication (through CDP): This allows for more sophisticated testing, such as intercepting network requests and real-time monitoring of browser events, which were not possible with previous Selenium versions.
8.
Can we test APIs or web services using Selenium Webdriver?
Selenium WebDriver is not designed to test APIs or web services directly. It is a tool for automating web browsers, and its primary purpose is to interact with web pages by simulating user actions. Testing APIs or web services typically involves sending HTTP requests and validating the responses, which is not a capability provided by Selenium WebDriver.
If an API or web service interaction is part of a larger web application flow that can be accessed through a browser interface, Selenium WebDriver can be used to automate the browser interactions and indirectly verify that the web service is working as expected. However, it will not be able to test the API or web service independently of the user interface.
For true API or web service testing, tools explicitly designed for this purpose, such as Postman, Rest-Assured (for Java), HTTPie, or frameworks like JMeter, are more appropriate. These tools allow you to send requests to APIs and validate the responses without the need for a user interface. They can handle various types of requests (GET, POST, PUT, DELETE, etc.), set headers, work with different data formats like JSON or XML, and verify response codes and payloads.
To best utilize test automation efforts, it's recommended to use Selenium WebDriver for what it is designed for — automated testing of web applications through browsers — and to employ other more suitable tools for API or web service testing.
9.
What are the various ways of locating an element in Selenium?
In Selenium, elements within a web page can be located using various strategies, each suitable for different scenarios. Here are the primary locator strategies:
- By ID: Using the By.id locator with find_element to locate an element with a specific ID, which is presumed to be unique in the DOM.
WebElement elementById = driver.findElement(By.id("elementId"));
- By Name: Using By.name to find an element with the name attribute.
WebElement elementByName = driver.findElement(By.name("elementName"));
- By Class Name: Employing By.className to locate an element using its class attribute. It's useful for elements with a common styling class.
WebElement elementByClassName = driver.findElement(By.className("className"));
- By Tag Name: With By.tagName, you can find an element by its HTML tag.
WebElement elementByTagName = driver.findElement(By.tagName("tagName"));
- By Link Text: By.linkText is ideal for locating anchor () elements by their exact text content.
WebElement elementByLinkText = driver.findElement(By.linkText("Link Text"));
- By Partial Link Text: Similar to By.linkText but allows partial matches, which can be useful if the link text is long or dynamic.
WebElement elementByPartialLinkText = driver.findElement(By.partialLinkText("Partial Link Text"));
- By XPath: By.xpath lets you navigate through elements and attributes within the HTML document to locate complex or nested elements.
WebElement elementByXpath = driver.findElement(By.xpath("//div[@id='example']"));
- By CSS Selector: By.cssSelector can locate elements by their CSS properties, and it’s a powerful method for complex, style-based queries.
WebElement elementByCssSelector = driver.findElement(By.cssSelector(".class #id"));
10.
How can we inspect the web element attributes in order to use them in different locators?
To inspect web element attributes, you can use various browser developer tools like Chrome DevTools or Firefox Developer Tools. Here's how you can answer this:
- Right-click on the element you want to inspect and select "Inspect" from the context menu. This will open the developer tools.
- In the developer tools, ensure you are in the "Elements" or "Inspector" tab.
- Locate the HTML code corresponding to the element you want to inspect. It will be highlighted in the developer tools.
- In the HTML code, you can find different attributes of the element such as "id", "class", "name", etc.
- You can use these attributes in different locators like CSS selectors, XPath, or others to locate the element in test automation.
11.
What is an XPath?
XPath is a language used to locate elements on a webpage. It stands for XML Path Language, and it uses path expressions to navigate through the XML structure of the page. XPath allows for the selection of elements based on properties such as tag name, attribute values, and more.
This language can be used in conjunction with other web development tools, such as Selenium, to help users automate tests and find specific elements on a page.
12.
What is an absolute XPath?
An absolute XPath is a way to locate an element on a web page by providing the complete path from the root element to the target element. This path starts at the HTML tag, which is the parent of all other elements, and includes every parent element of the target element up until the root of the document.
Absolute XPaths are useful when you need to specify an exact location for an element and have a unique, non-changing path to that element. However, they can be long and unwieldy, making them less flexible and more difficult to read and maintain. Additionally, if the structure of the page changes, the XPath may no longer be valid, requiring updates to be made.
13.
What is a relative XPath?
A relative XPath is a way to locate elements in a web page based on their relationship to other elements. It is a shorter and more concise XPath expression compared to using an absolute XPath. The relative XPath starts from the current context node and navigates through the HTML structure.
It uses various techniques like traversing through parent, child, and sibling elements to find the desired element. Relative XPath is useful when the structure of the web page changes frequently, as it allows developers to find elements based on their relative position rather than relying on specific paths.
14.
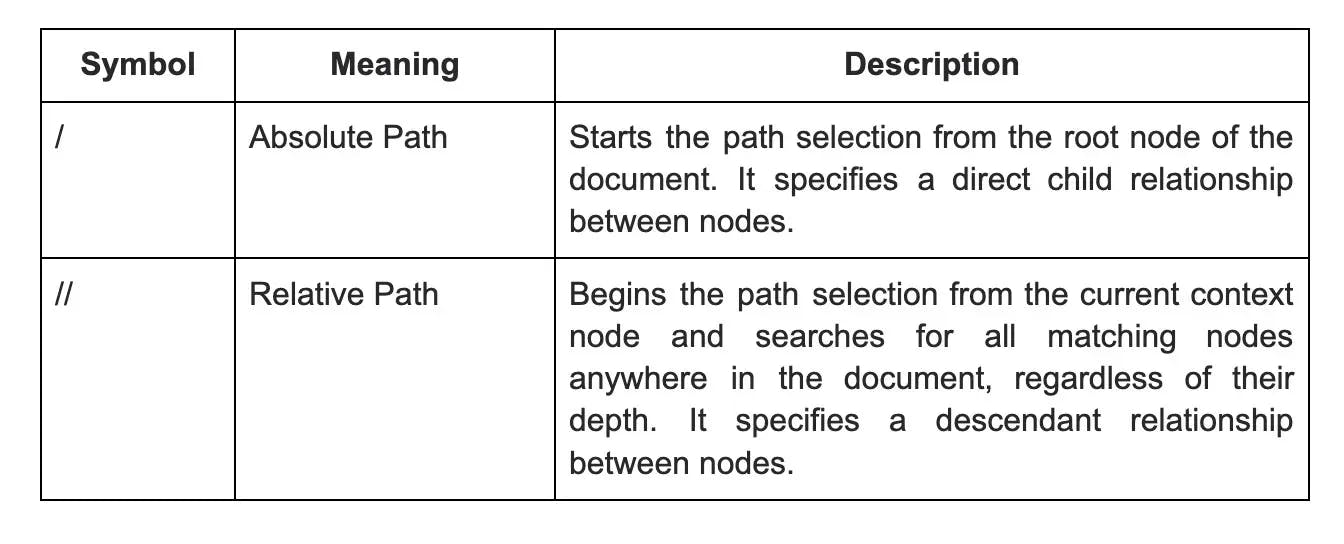
What is the difference between a single slash(/) and a double slash(//) in XPath?
15.
How can we locate an element by only partially matching the value of its attributes in Xpath?
To locate an element by partially matching the value of its attributes in XPath, you can use the "contains" function. The contains function checks if a particular attribute contains the specified value.
For example, if you want to locate an element with an attribute value that starts with "abc", you can use the XPath expression //*[contains(@attributeName, 'abc')]. This will find all elements that have the attribute with a value containing "abc". The * selects any element, but you can also specify the element type instead.
This method is helpful when the value of the attribute is dynamic and you need to match it only partially.
16.
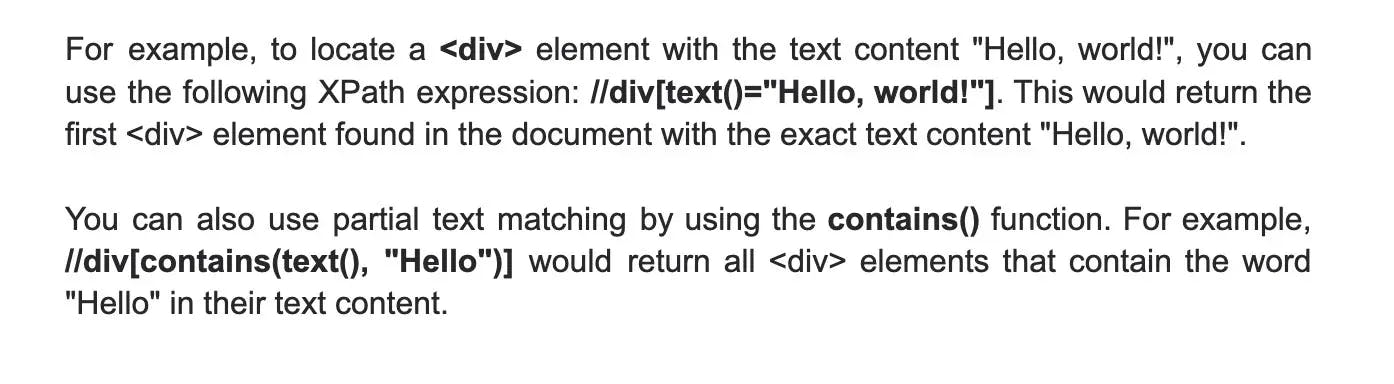
How can we locate elements using their text in XPath?
To locate elements using their text in XPath, you can use the text() function within the XPath expression. This allows you to select elements based on their text content, rather than their attributes or other properties.
17.
How can we move to the parent of an element using XPath?
To move to the parent of an element using XPath, we can use the ".." notation. This notation allows us to navigate up the tree to the parent element of the current node. For example, if we have an XML document with the following structure:
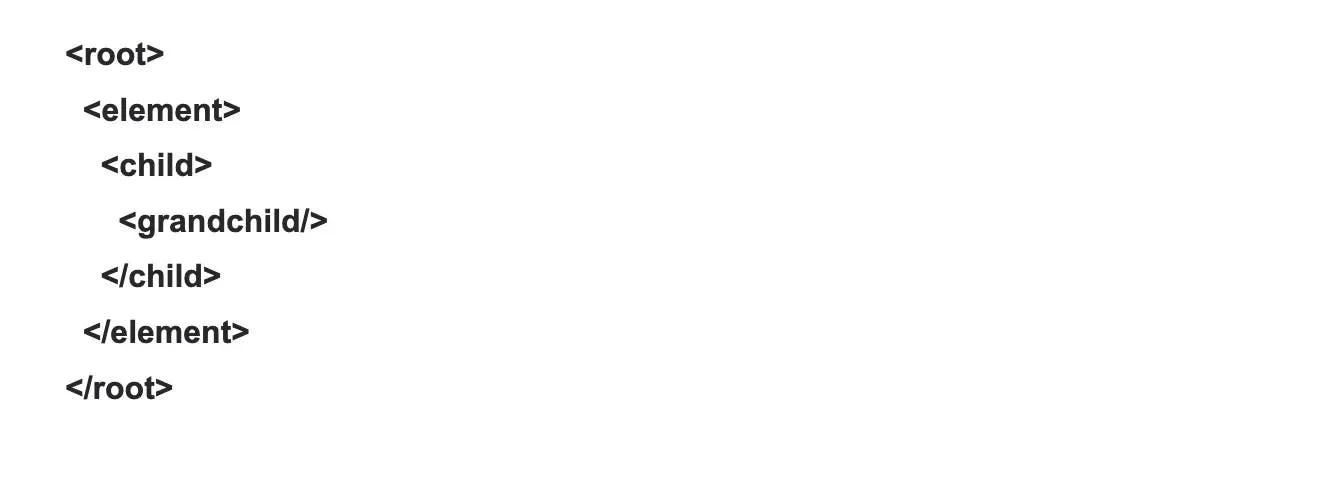
And we are currently at the "grandchild" element, we can use the XPath expression "../.." to select the "element" node, which is the parent of the "child" node, which is the parent of the "grandchild" node. This notation can be used repeatedly to navigate up the tree to higher-level parent elements as needed.
18.
How can we move to the nth-child element using XPath?
In XPath, to move to the nth child of a specific element, you can use the square bracket notation which provides a way to select the nth element in a list of siblings. Here's the basic syntax:
//parent_element/*[n]
For example, if you want to select the third child of a element, your XPath would look like this:
//div/*[3]
This XPath expression selects the third child element of every in the document, irrespective of the child's tag name.
If you know the tag name of the child element, you can specify it directly:
//div/child_element_tag[3]
Furthermore, to select elements based on a repeating pattern, such as every other child starting from the second, you would use the position() function and the modulus operator in a predicate. Here's how you might express this:
//parent_element/*[position() mod 2 = 0 and position() >= 2]
This XPath expression selects every second child of the parent_element, starting from the second child. position() gives the current position of the node as it's processed, mod 2 checks for every second node, and the position() >= 2 ensures that the counting starts from the second child.
Note: The nth-child() pseudo-class used in your example is specific to CSS Selectors, not XPath. XPath and CSS Selectors, while similar in their goal to select nodes or elements from a document, have different syntax and capabilities.
19.
What is the syntax of finding elements by class using CSS Selector?
To find elements by class using CSS Selector, the syntax is as follows:
element.class
For example, if you wanted to find all elements with the class name "container", you would use the following CSS Selector:
.container
This would select all elements with the class name "container". It's important to note that when using CSS Selectors to find elements by class, you must prefix the class name with a dot (".") to indicate that you are searching for a class. If you want to find multiple classes, you can chain them together by appending additional class names with no space in between:
.class1.class2
This would select all elements that have both class1 and class2.
20.
What is the syntax of finding elements by id using CSS Selector?
To find elements by their id attribute using CSS Selector, you can use the '#' symbol followed by the id value. The syntax is #idValue. For example, if you have an element with the id attribute set to myElement, you can select it with the following CSS Selector: #myElement.
This selector will match any element that has an id attribute with the exact value of myElement. It is important to note that the id value is unique within an HTML document, so this selector will only match a single element. If there are multiple elements with the same id, only the first one will be selected.
21.
How can we select elements by their attribute value using the CSS Selector?
To select elements by their attribute value using the CSS Selector, we use the syntax [attribute=value]. The attribute is the name of the element's attribute, and the value is the value of that attribute we want to select.

22.
How can we move to the nth-child element using the CSS selector?
To move to the nth-child element using the CSS selector, you can use the :nth-child() pseudo-class. This selector allows you to target elements based on their position within their parent element.
To use the :nth-child() selector, you specify the expression inside the parentheses. The expression can be a number, keyword, or formula. For example, :nth-child(3) will target the third child element, while :nth-child(even) will target all even child elements.
This selector is a powerful tool when you want to apply specific styles or manipulate certain elements based on their position in a list or container.
23.
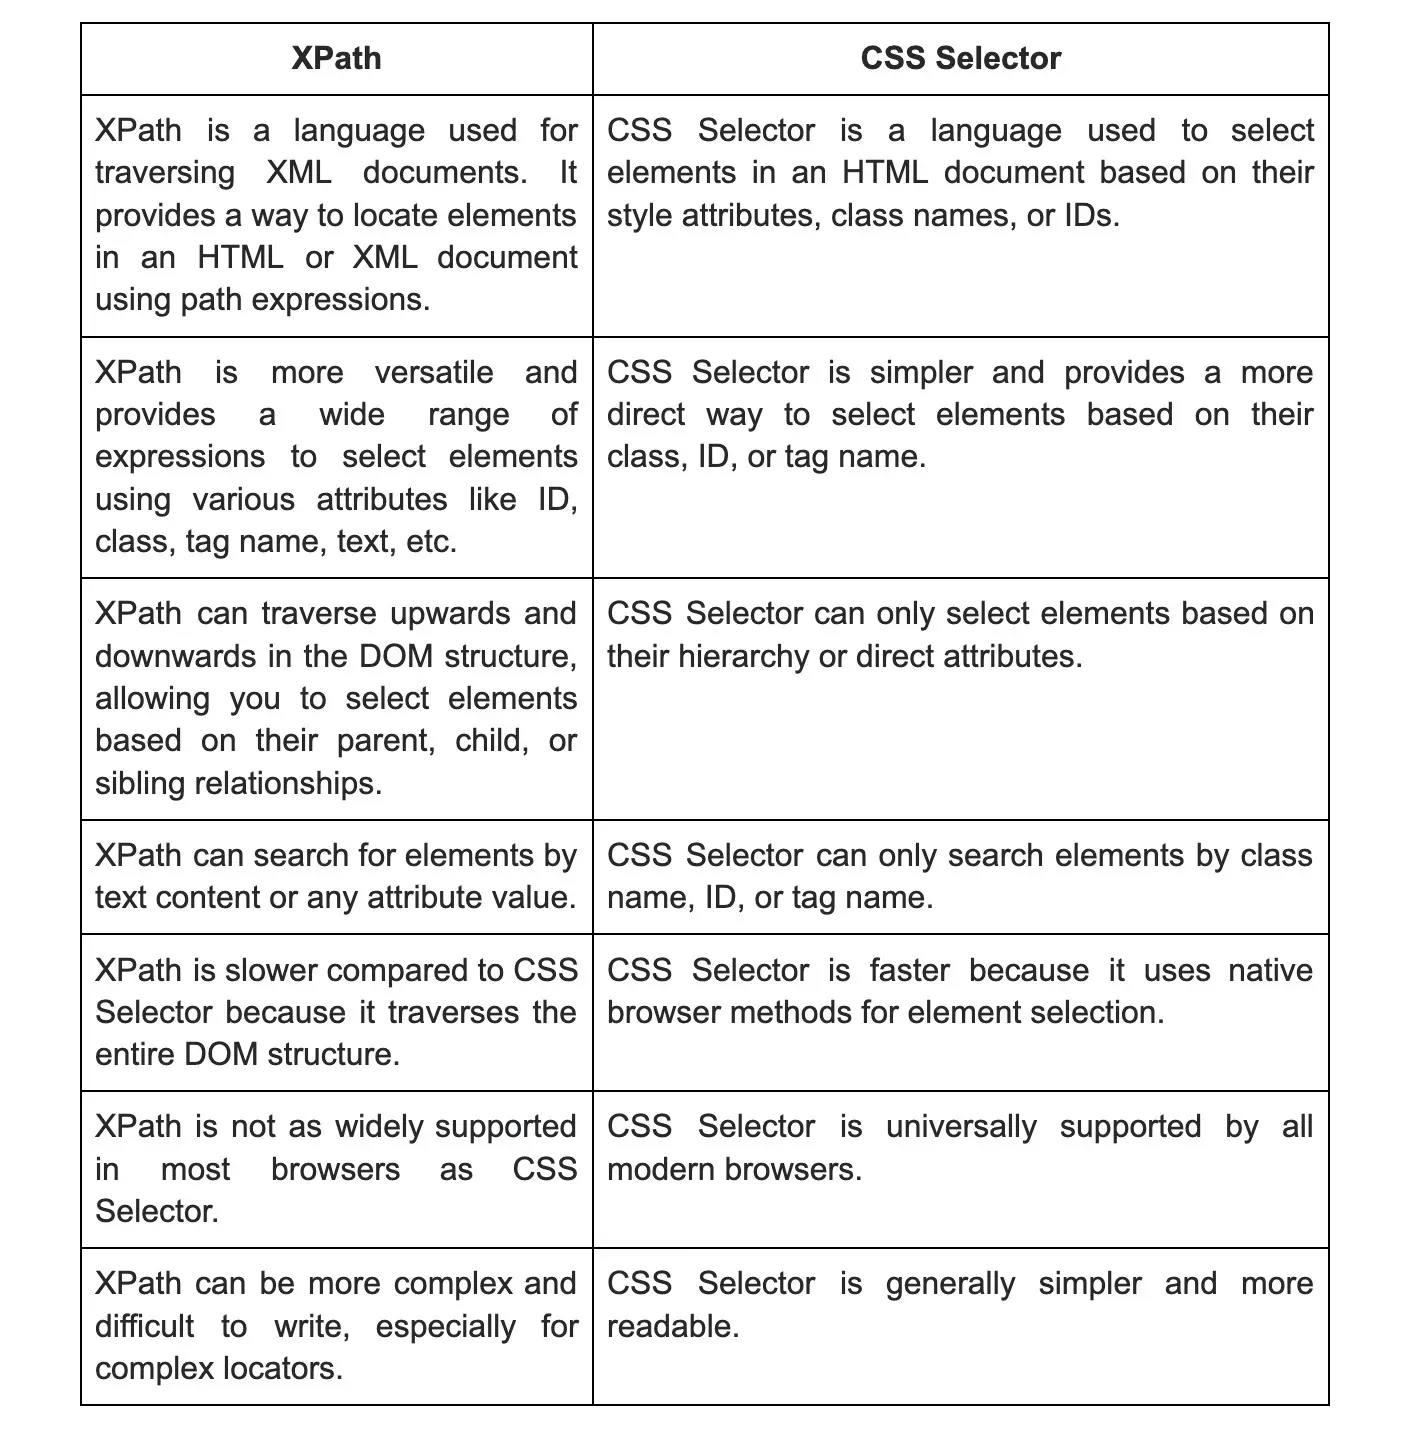
What is the fundamental difference between XPath and CSS selectors?
Tired of interviewing candidates to find the best developers?
Hire top vetted developers within 4 days.
Intermediate Selenium interview questions and answers
1.
How can we launch different browsers in Selenium WebDriver?
In Selenium WebDriver, we can launch different browsers by following these steps:
- First, ensure that the appropriate driver executable is downloaded and available in the system.
- Initialize the WebDriver object with the desired browser-specific driver class.
- Use the WebDriver object to open the desired browser by invoking the get() method and passing the URL.
- To launch different browsers, like Chrome, Firefox, or Safari, use the respective driver classes such as ChromeDriver, FirefoxDriver, or SafariDriver when initializing the WebDriver object. This ensures that the WebDriver launches the specific browser.
- Once the browser is launched, we can perform various automation tasks on the web application using the available WebDriver methods and functionalities.
2.
What is the use of driver.get(“URL”) and driver.navigate().to(“URL”) commands? Is there any difference between the two?
Both driver.get("URL") and driver.navigate().to("URL") are commands in Selenium WebDriver used to navigate to a specific URL. The difference between the two lies in how they handle the page navigation.
driver.get("URL") is a simple command that instructs the WebDriver to directly open the specified URL in the current browser window. It waits for the page to load completely before proceeding to the next command.
On the other hand, driver.navigate().to("URL") is a command that is more dynamic in nature. It allows the WebDriver to navigate to the specified URL, but also enables the WebDriver to navigate backward and forward through the browser's history. This means that it can be used to go back to a previously visited page or navigate forward to the next page.
3.
How can we type text in a textbox element using Selenium?
In Selenium WebDriver, we can type text in a textbox element with the following steps:
- Import the esential libraries in slenium like: webdriver.
- Use the find_element_by method to locate the textbox element on the web page.
- Use the send_keys() method to simulate typing text into the textbox element.
- Pass the text we want to type as an argument within the send_keys() method.
- After typing the text into the textbox element, we can either submit it by simulating the pressing of the "Enter" key, or we can click on a submit button by using submit() or **click() **methods.
- For example, to type "Hello World" into a textbox element with the name "text_input", we would use the following code:
text_input = driver.find_element_by_name("text_input")
text_input.send_keys("Hello World")
This would fill the textbox element with the text "Hello World".
4.
How can we clear a text written in a textbox using Javascript?
- Identify the textbox you want to clear by its id or any other suitable attribute.
- Use the getElementById function to obtain a reference to the textbox in JavaScript.
- Once you have the reference, set the value property of the textbox to an empty string ("").
- This will remove the existing text and clear the textbox.
5.
How to check a checkbox in Selenium?
- Identify the checkbox element using proper locators like ID, class, or xpath.
- Use the find_element method to locate the checkbox element.
- Once the checkbox element is found, use the click method to simulate a click on the checkbox.
- Verify if the checkbox is checked using the is_selected method, which returns a Boolean value.
- Optionally, you can also use the isSelected method to verify if the checkbox is selected or not.
6.
How can we submit a form in Selenium?
To submit a form in Selenium, you can use the submit() method on the form element. First, you need to find the form element using one of Selenium's locating mechanisms, such as find_element_by_id() or find_element_by_name(). Once you have located the form element, you can call submit() on it to submit the form. This will simulate the behavior of clicking the submit button.
Alternatively, if the form has a submit button, you can directly locate the submit button element and call click() on it. Both methods will trigger the form submission process in Selenium.
7.
Explain the difference between close and quit commands.

8.
How to switch between multiple windows in Selenium?
- Use driver.getWindowHandles() to get the handles of all the open windows.
- Store the handles in a set.
- Use a loop to iterate through the set of window handles.
- Use driver.switchTo().window(handle) to switch to each window handle one by one.
- Perform the required actions on the window.
- To switch back to the parent window, use driver.switchTo().window(parentHandle), where parentHandle is the handle of the parent window.
- Finally, close any additional windows or switch to the desired window.
9.
What is the difference between driver.getWindowHandle() and driver.getWindowHandles() in Selenium?
driver.getWindowHandle() is a method in Selenium that returns a unique identifier for the currently focused window or tab. It is used to handle situations where you want to interact with the content of a specific window.
On the other hand, driver.getWindowHandles() is a method that returns a set of unique identifiers for all the open windows or tabs. This is useful when you want to switch between multiple windows or tabs and perform actions on each of them.
In summary, driver.getWindowHandle() returns the handle of the current window and driver.getWindowHandles() returns a collection of handles for all open windows.
10.
How can we move to a particular frame in Selenium?
Identify the frame you want to switch to. You can use the driver.switch_to.frame() method to switch to a frame by using its name or index.
If the frame has a name or ID, you can switch to it by passing the name or ID as an argument to the switch_to.frame() method.
If the frame does not have a name or ID, you can switch to it by passing its index (an integer value) as an argument to the switch_to.frame() method.
11.
Can we move back and forward in the browser using Selenium?
Yes, using Selenium, you can navigate back and forward in the browser just like a user would. Selenium provides methods for this functionality. To move back, you can use the back() method, and to move forward, you can use the forward() method. By using these methods, you can easily control the browser's navigation flow in your Selenium tests.
12.
What are the different ways to refresh a browser using Selenium?
There are several ways to refresh a browser using Selenium, including:
- Using the WebDriver's .navigate().refresh() method.
- Using the WebDriver's get() method and passing in the current URL.
- Using keyboard events with the Actions class to send the F5 key.
- Using keyboard events with the Actions class to send the CTRL + R (for Windows) or CMD + R (for Mac) keys.
- Using the JavascriptExecutor to execute location.reload().
13.
How can we maximize the browser window in Selenium using Python?
To maximize the browser window in Selenium with Python you can use the maximize_window() method from the webdriver module. First, you need to instantiate a driver object of your selected browser. Then, you need to call the maximize_window() method on the driver object.
This will enlarge the window to its maximum size and give a better view of website contents. You can also set custom dimensions by passing the desired values to the set_window_size() method in case you don't want to maximize the window.
Maximizing the browser window in Selenium is a simple way to improve test visibility and ensure that elements are accurately detected.
14.
How can we fetch a text written over an element?
- HTML and JavaScript: Use getElementById to target the element by its ID, and then access the innerText property to retrieve the text.
- Python and Selenium: Use the find_element method to locate the element using its class, id, or other attributes, and then use the text property to fetch the text.
- jQuery: Use the text method to retrieve the content of the element.
15.
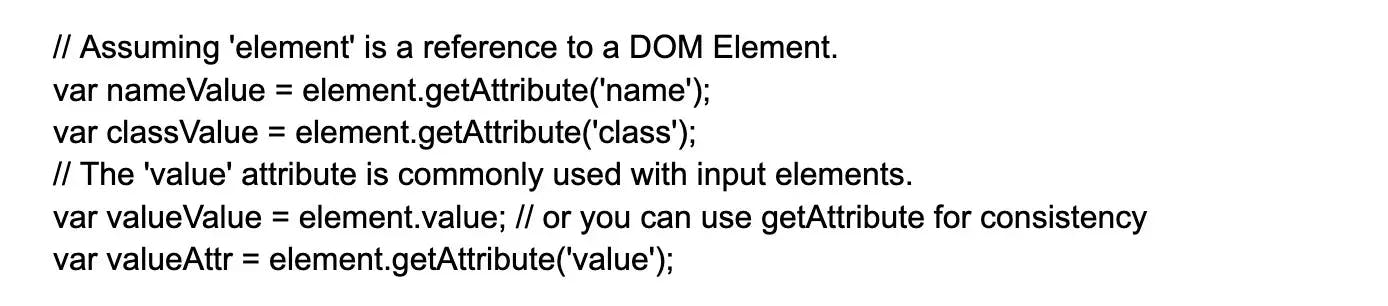
How can we find the value of different attributes like name, class, and value of an element?
To find the value of different attributes such as name, class, and value of an element within the context of a web page, you can use the .getAttribute() method in JavaScript, and in the case of Selenium WebDriver, it can be get_attribute() in Python, Java, or other selenium-supported languages.
Here's how you can retrieve these values using pure JavaScript:
And in Selenium WebDriver with Python, the method is similar but follows the WebDriver API design:
from selenium import webdriver
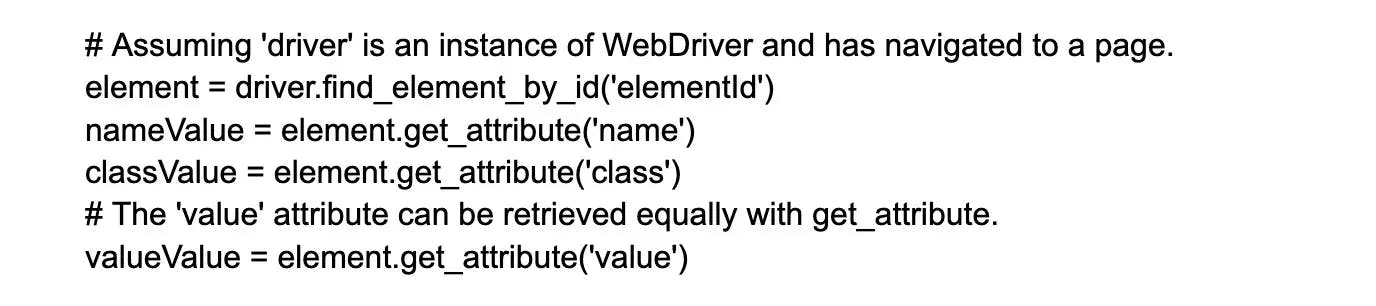
In both pure JavaScript and Selenium, the syntax pattern for grabbing an attribute is quite similar, i.e., using a .getAttribute() method, which works for any attribute on an element. For form fields such as input, textarea, or select tags, you could reference the .value property to directly get the current value of the form control.
16.
How to delete cookies in Selenium?
To delete cookies in Selenium, there's a built-in method named 'delete_all_cookies()'. This method will delete all cookies associated with the current domain of the WebDriver, regardless of their expiry dates.
To use this method, first, navigate to the desired website, and then call 'delete_all_cookies()' method. This will wipe all the previous cookies related to that website.
Below is an example:
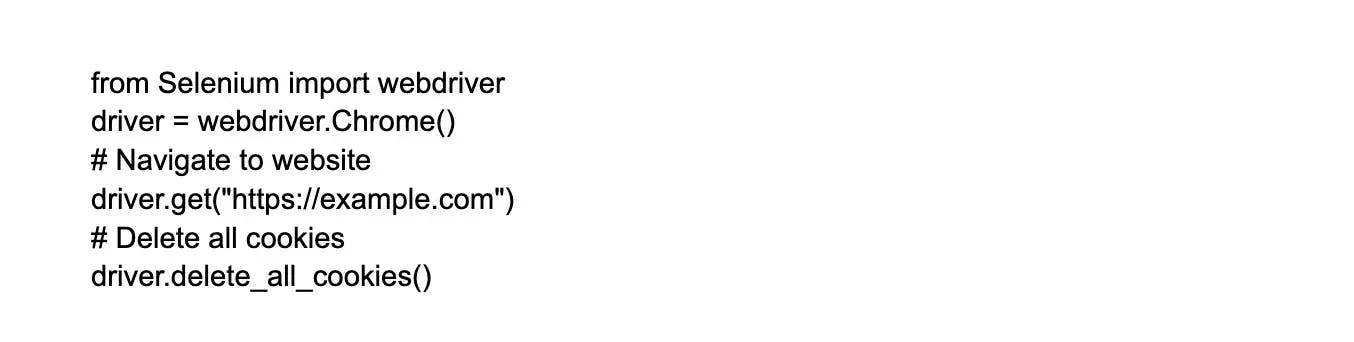
This is a simple way to delete cookies in Selenium. After this method is called, any subsequent requests made by Selenium will have no cookies associated with them.
17.
What is an implicit wait in Selenium?
An implicit wait is a technique used in Selenium to provide a waiting period for web elements to load before the actual execution of the test case. The implicit wait waits for the web elements to load within a specified amount of time and if the element is not present, it throws an exception.
It helps in reducing the execution time of the test case by providing time control to the test execution flow, ensuring that the test cases do not fail due to incorrect synchronization issues. With an implicit wait in place, the test scripts can wait for a given time period before proceeding to the next step.
18.
What is an explicit wait in Selenium?
An explicit wait in Selenium is a method that allows the test to pause execution until a certain condition is met. It helps to ensure that the desired element is present or ready before proceeding with the next step in the test. This wait is necessary for handling dynamic web pages where elements may take some time to load or become available.
With an explicit wait, the test waits for a specific condition, such as the element being visible or clickable, and continues execution only when the condition is met. This improves the reliability and stability of the test scripts.
19.
What are some expected conditions in Explicit waits?
- PresenceOfElementLocated: Waits until an element is present in the DOM.
- VisibilityOfElementLocated: Waits until an element is visible on the web page.
- ElementToBeClickable: Waits until an element is clickable, i.e., enabled and visible.
- TextToBePresentInElement: Waits until the specified text is present in the element.
- ElementToBeSelected: Waits until an element is selected.
- TitleContains: Waits until the web page title contains the specified text.
These conditions help ensure that the desired element or condition is present or fulfilled before proceeding further.
20.
What is a fluent wait?
A Fluent Wait is a feature in Selenium WebDriver that allows the tester to define the maximum time to wait for a web element to be available before a timeout exception is triggered. The wait is set to allow time for the web page to be updated, so the script can interact with the web element when it is ready.
In other words, a Fluent Wait lets the script waits for the web element not just for a specific time period but also taking into consideration the specific conditions of the web element that expected. This means it is much more flexible way to wait for elements than a standard explicit wait.
21.
What are the different keyboard operations that can be performed in Selenium?
sendKeys:
Send a sequence of keystrokes to an element, typically used on input fields.
Example:
element = driver.find_element(By.ID, "inputField")
element.send_keys("text to enter")
sendKeys (With Keys enum):
Used to send special key presses like Enter, Tab, etc.
Example:
element.send_keys(Keys.ENTER)
The Actions class:
The methods pressKey and releaseKey do not exist as individual methods in the standard Selenium WebDriver API. Instead, keyboard interactions involving modifier keys are done using the Actions class.
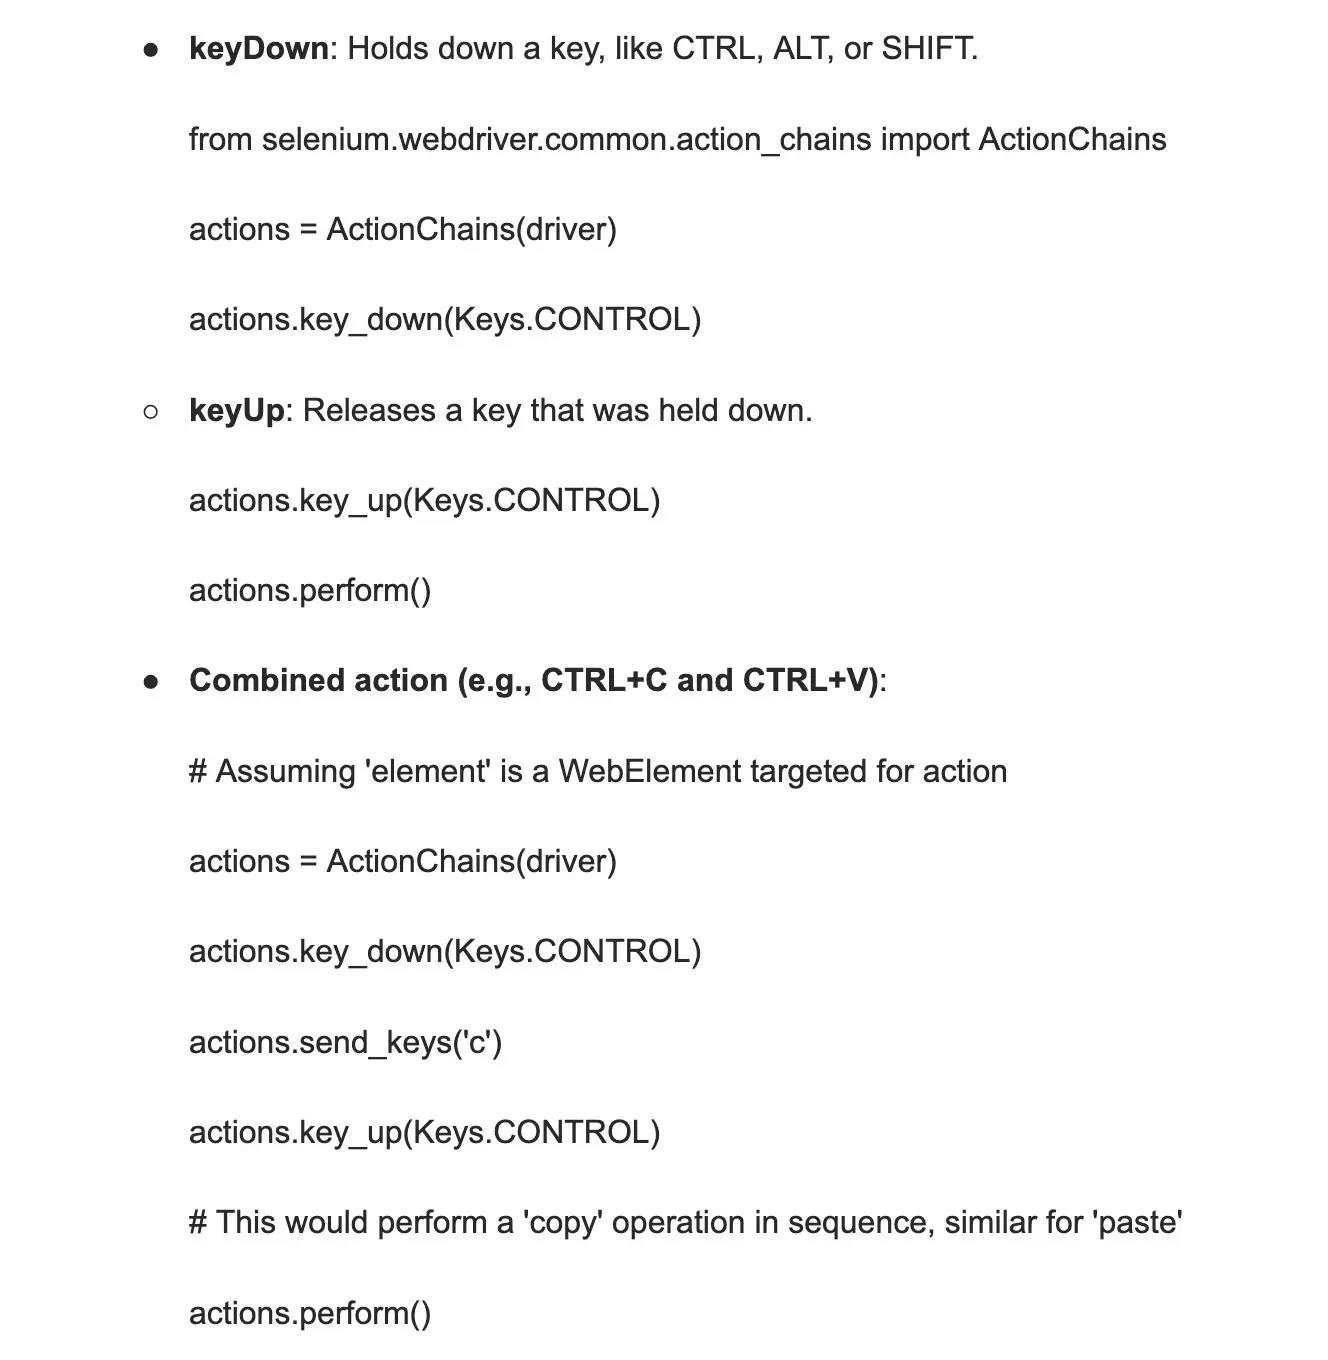
The Actions class allows for more complex sequences of key events to be constructed, such as pressing and holding keys, releasing them, and even chaining them with other mouse-based actions. It's a more flexible and versatile way to simulate the variety of possible keyboard actions a user can perform.
22.
What are the different mouse actions that can be performed using Selenium?
- Click(): used to make a left-click on a specified element, such as a button or image.
- Double Click(): used to make two consecutive clicks on the specified element.
- Context Click(): used to make a right-click on the specified element.
- Click And Hold(): used to make a left-click on a specified element and hold it down for a specific period of time.
- Drag And Drop(): used to click and hold an element and then move it to a specific location on the web page. Overall, these mouse actions can be useful for mimicking user behaviour in order to test web applications more thoroughly.
23.
Write the code to double-click an element.
To perform a double-click on an element using Selenium, you can utilize the Actions class provided by the Selenium WebDriver. Here's a Java example demonstrating the double-click action:
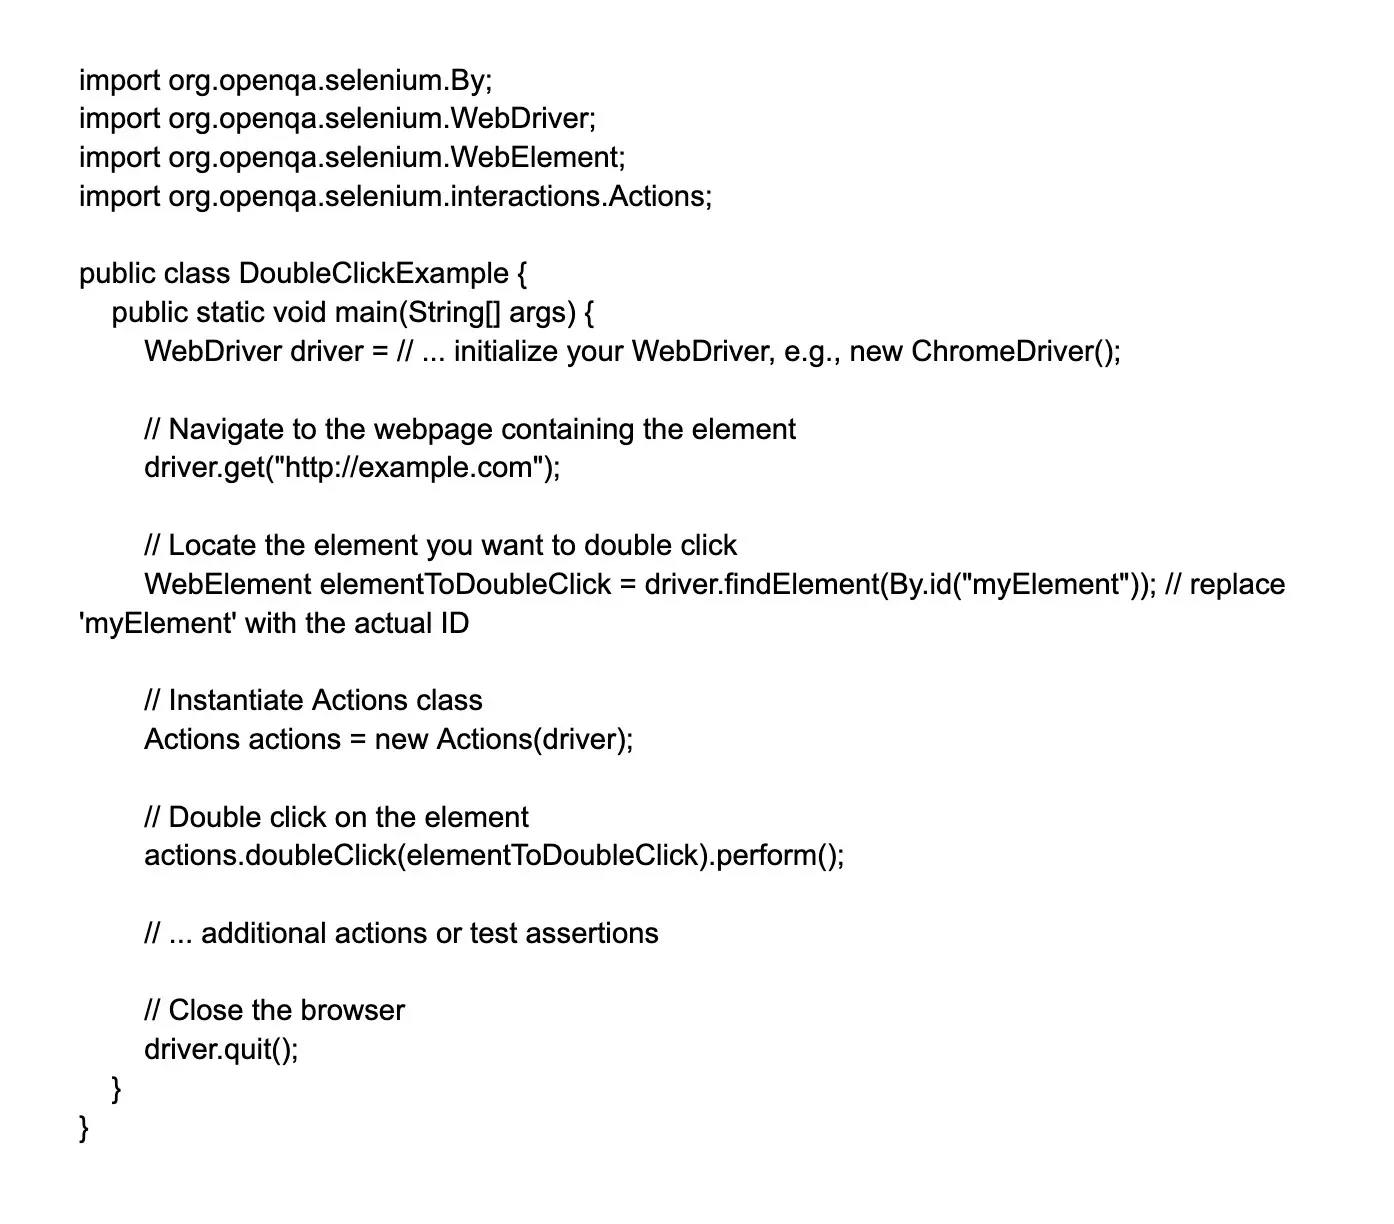
In the provided code snippet, replace 'myElement' with the actual ID of the element you want to double-click. The Actions object's doubleClick method is called with the target element, and the perform method executes the action.
Ensure to close the WebDriver session properly after the test execution to avoid leaving the browser open.
Remember, this is Java specific, and for languages like Python, C#, or others supported by Selenium, the syntax will differ slightly but the concept remains the same.
24.
Write the code to right-click an element.
When working with Selenium WebDriver, you might want to simulate a right-click (context click) on a web element. Selenium provides an Actions class that you can use to perform complex user interactions. Here is how you can right-click an element using Selenium's Actions class in Java:
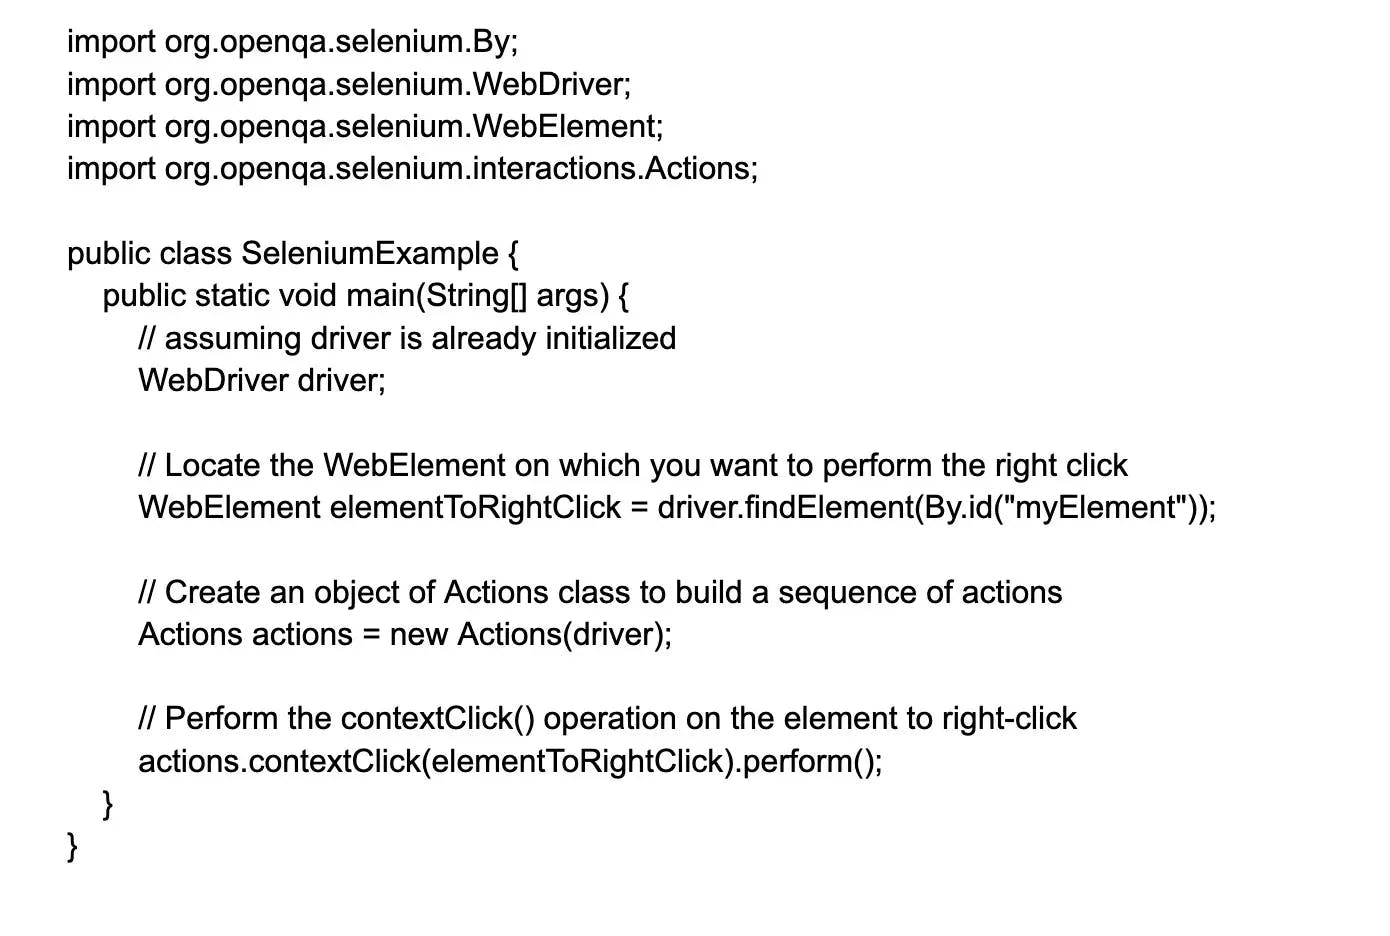
This code snippet demonstrates the use of Actions and contextClick() methods in Selenium to perform a right-click operation on an element found by its ID. Ensure your WebDriver instance driver is properly initialized before executing this code.
Be sure to perform proper code reviews and testing to validate the functionality of the provided examples. Additionally, ensure all explanations and examples adhere strictly to the Selenium context and provide correct, working code that is straightforward and easy to understand for the readers who will be applying this knowledge in a practical setting.
25.
How to mouse hover an element in Selenium?
To simulate a mouse hover event over a web element in Selenium, you can use the ActionChains class from the Selenium WebDriver API. Below is the step-by-step guide:
Import the ActionChains class:
from selenium.webdriver.common.action_chains import ActionChains # Corrected the class name
Create an instance of the ActionChains class by passing the WebDriver instance to it:
driver = ... # Assume you have already set up your WebDriver instance
actions = ActionChains(driver)
Find the web element you want to hover over using the appropriate selector:
element_to_hover_over = driver.find_element_by_xpath("//xpath/to/element")
#Make sure to replace "//xpath/to/element" with the actual XPath of the element.
Use the move_to_element method to perform the hover action:
actions.move_to_element(element_to_hover_over).perform()
This code will simulate moving the mouse cursor over the specified element, which is equivalent to a mouse hover action. Following these steps should achieve the desired interaction with the web element in your Selenium tests.
It's important to replace "//xpath/to/element" with the actual XPath to the element you wish to hover over. Also, ensure that you've correctly initialized the driver variable with your instance of WebDriver.
26.
How to fetch the current page URL in Selenium?
To fetch the current page URL in Selenium, you can use the driver.current_url method. This will return a string containing the complete URL of the current page. Here's an example:
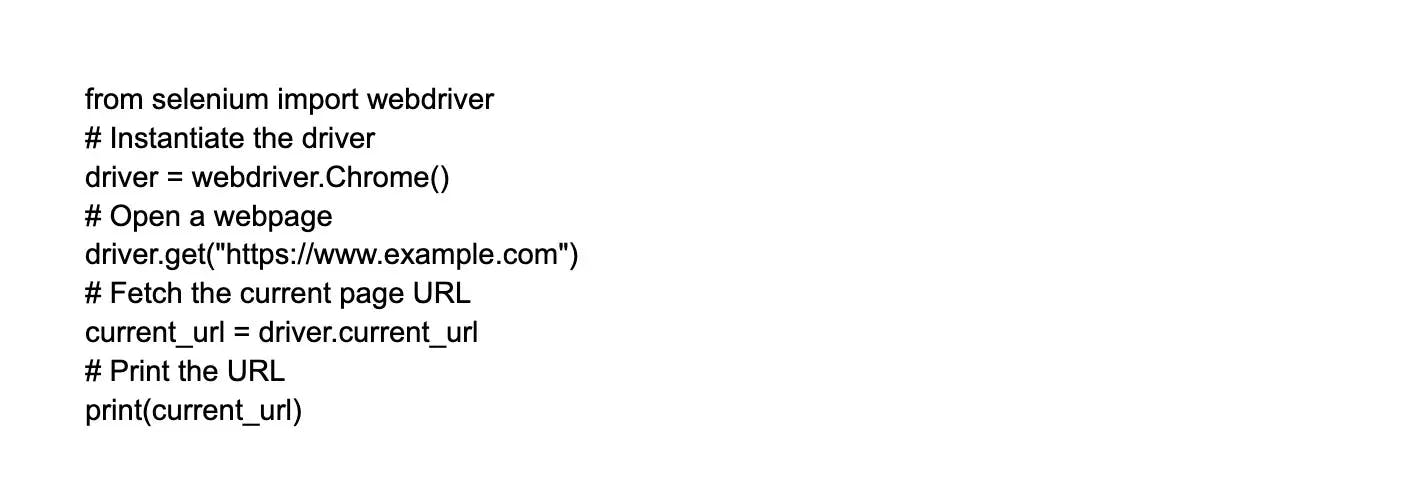
In the above example, the driver.current_url method is used to fetch the URL of the current page. You can then store it in a variable for further use or print it directly.
27.
How can we fetch the title of the page in Selenium?
- First, make sure you have imported the necessary libraries for Selenium.
- Next, launch the browser and navigate to the desired page using driver.get().
- To fetch the title of the page, use the driver.title function. This will return the title of the current browser window.
- You can then store the title in a variable for further use or print it out for verification purposes.
28.
How can we fetch the page source in Selenium?
To fetch the page source in Selenium, you can use the driver.page_source method. This method retrieves the HTML source code of the current page.
Here is the code snippet you can use:
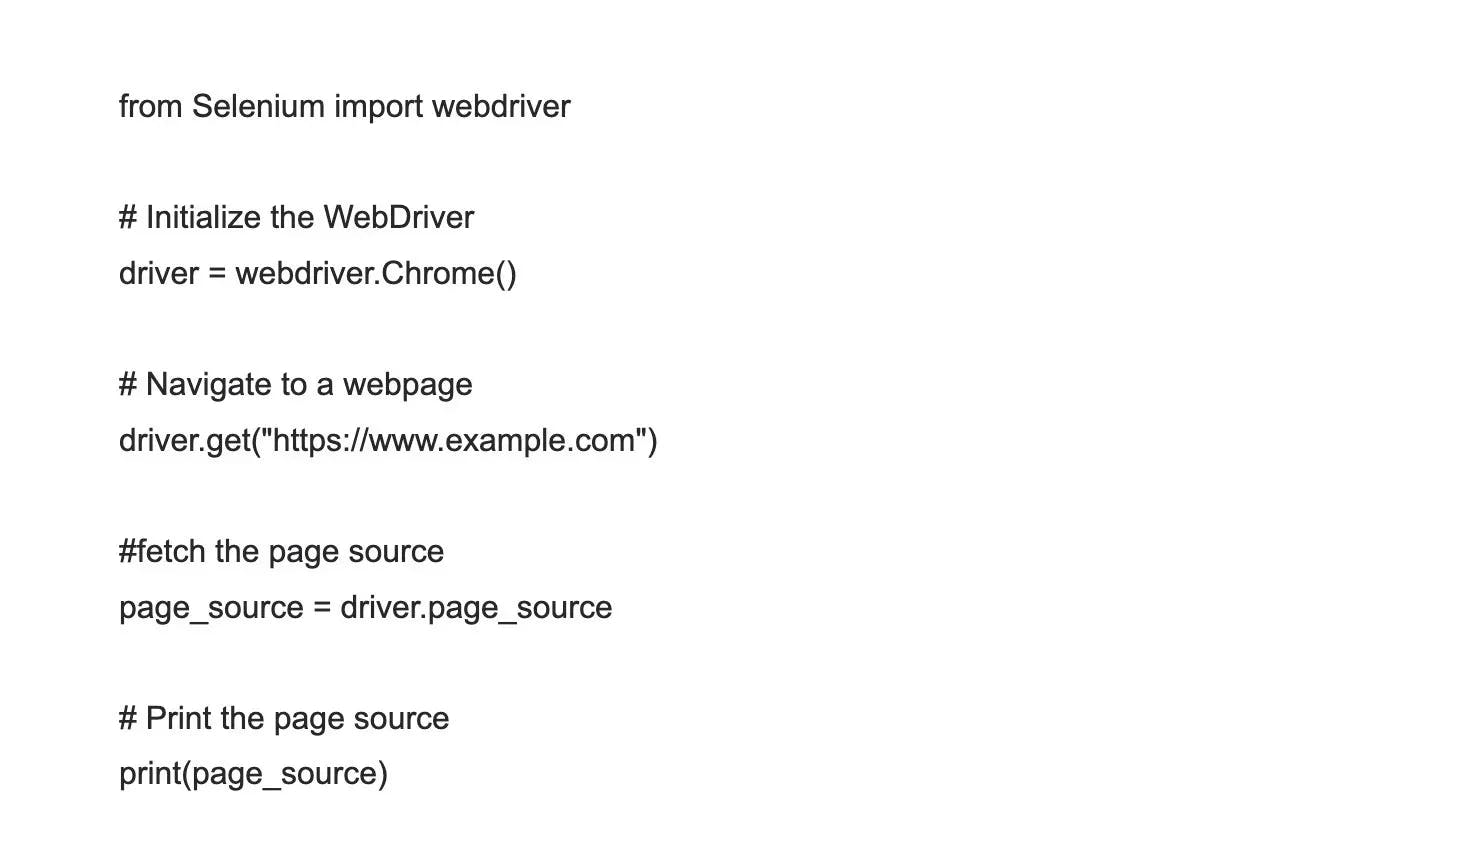
By using driver.page_source, you will be able to fetch and store the HTML source code of the webpage you are currently on.
29.
How to verify tooltip text using Selenium?
- Identify the element that triggers the tooltip.
- Use the getAttribute method to retrieve the value of the 'title' attribute. This attribute usually contains the tooltip text.
- Compare the retrieved tooltip text with the expected tooltip text using assertions or conditional statements.
- If the tooltip text matches the expected text, you can consider the verification successful. Otherwise, it indicates a test failure.
30.
How to locate a link using its text in Selenium?
To locate a link using its text in Selenium, you can use the find_element_by_link_text method. This method allows you to specify the exact text of the link that you want to locate.
Here is an example of how you can use this method:
link_text = "Click here"
link_element = driver.find_element_by_link_text(link_text)
In the code above, the link_text variable contains the exact text of the link you want to locate. The find_element_by_link_text method then returns the element that matches the specified link text. This allows you to interact with the link element like clicking on it or extracting its attributes.
31.
What are DesiredCapabilities in Selenium WebDriver?
DesiredCapabilities is a class in Selenium WebDriver that allows you to define the specific capabilities or properties of a browser that you want to use for your automated tests. It is used to configure the browser's settings such as browser name, version, platform, and more.
With DesiredCapabilities, you can set various parameters to customize your test execution, such as enabling/disabling JavaScript, accepting insecure SSL certificates, setting screen resolution, and many others.
By using DesiredCapabilities, you can ensure that your tests run consistently and accurately across different browser configurations and settings.
32.
How can we find all the links on a web page?
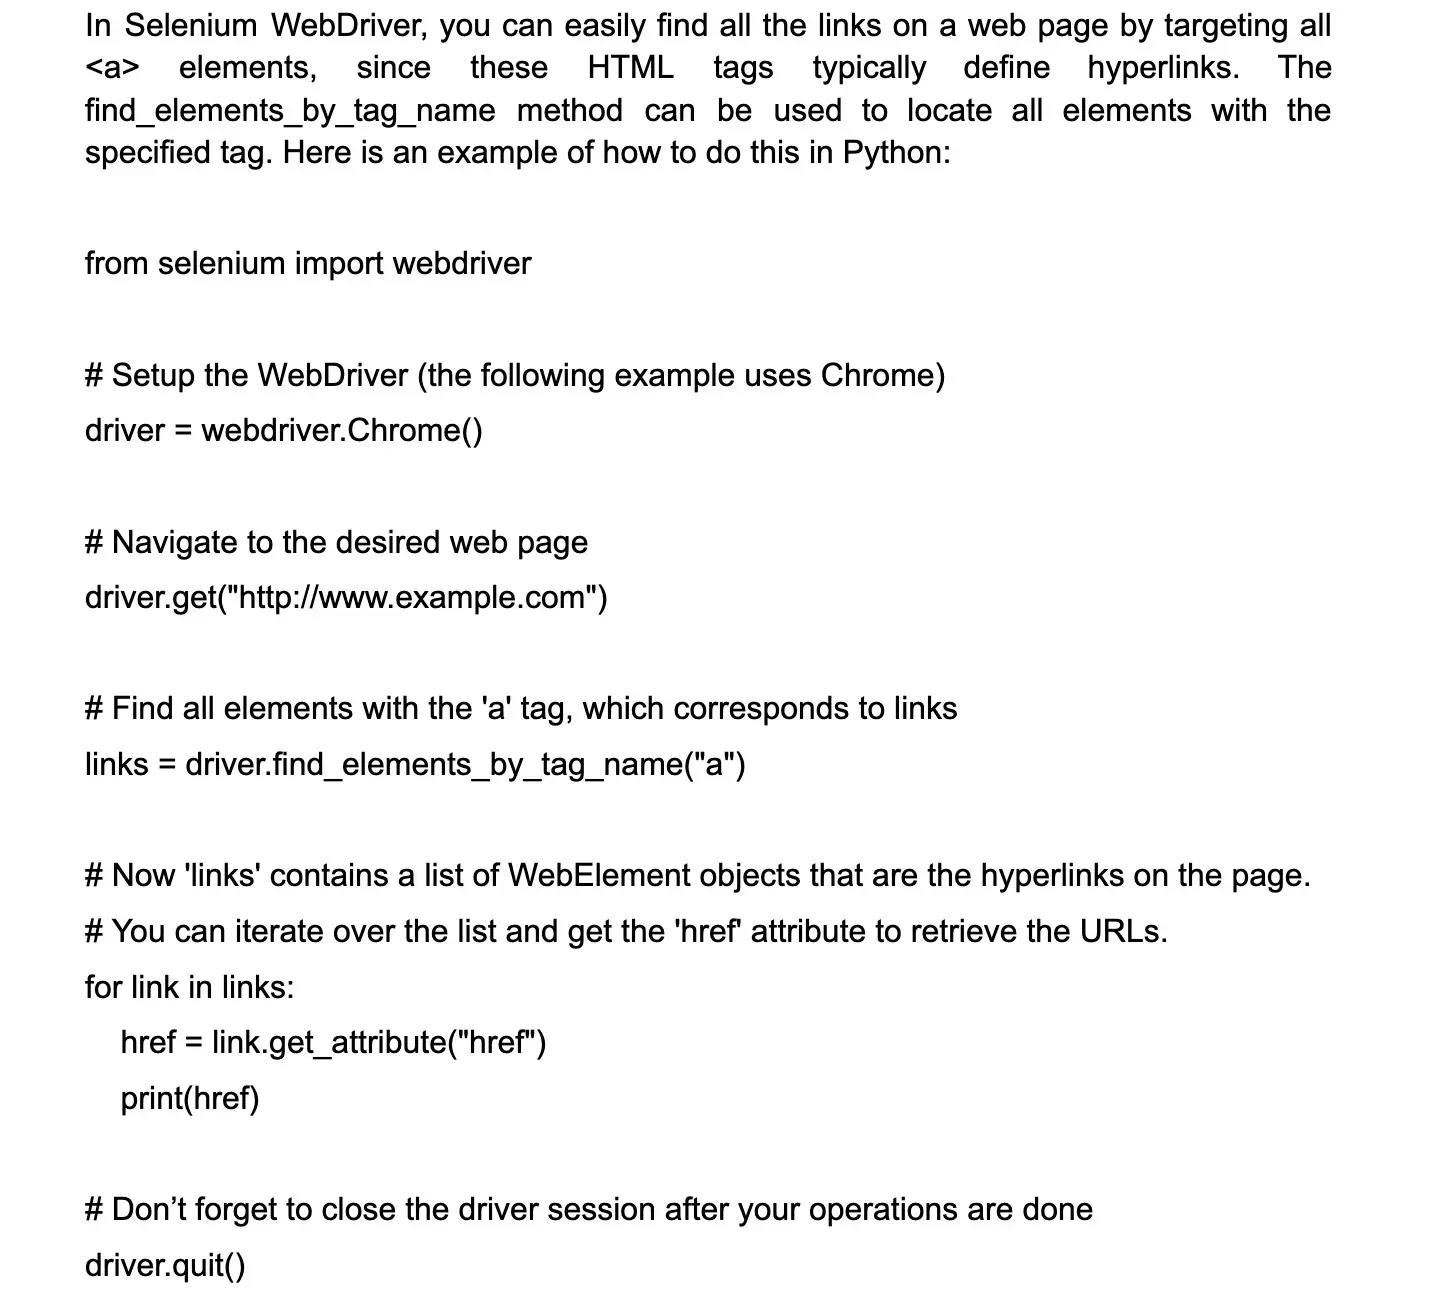
In the code snippet above, driver.find_elements_by_tag_name("a") is the key line that locates all hyperlink elements on the current page. After obtaining the list of WebElements, you can loop through each element and use the get_attribute function to extract the URL (href attribute) from each hyperlink.
33.
What are some commonly encountered exceptions in Selenium?
- NoSuchElementException: This exception occurs when the WebDriver is unable to locate an element on the webpage.
- ElementNotVisibleException: This exception is thrown when an element is present in the HTML DOM, but is not visible on the webpage.
- TimeoutException: This exception occurs when the WebDriver is unable to find an element within a specified time period.
- StaleElementReferenceException: This exception is thrown when an element is no longer attached to the DOM.
- WebDriverException: This is a general exception that can be thrown for various WebDriver issues.
34.
How can we capture screenshots using Selenium?
Taking screenshots is an essential feature of Selenium WebDriver for documenting the state of a web application at a specific point in time, often used for error analysis or test documentation.
To capture a screenshot with Selenium WebDriver in Java, follow these steps:
- Cast the WebDriver instance to the TakesScreenshot interface.
- Call the getScreenshotAs method with OutputType.FILE as the argument to obtain a screenshot as a file.
Here's a code snippet:
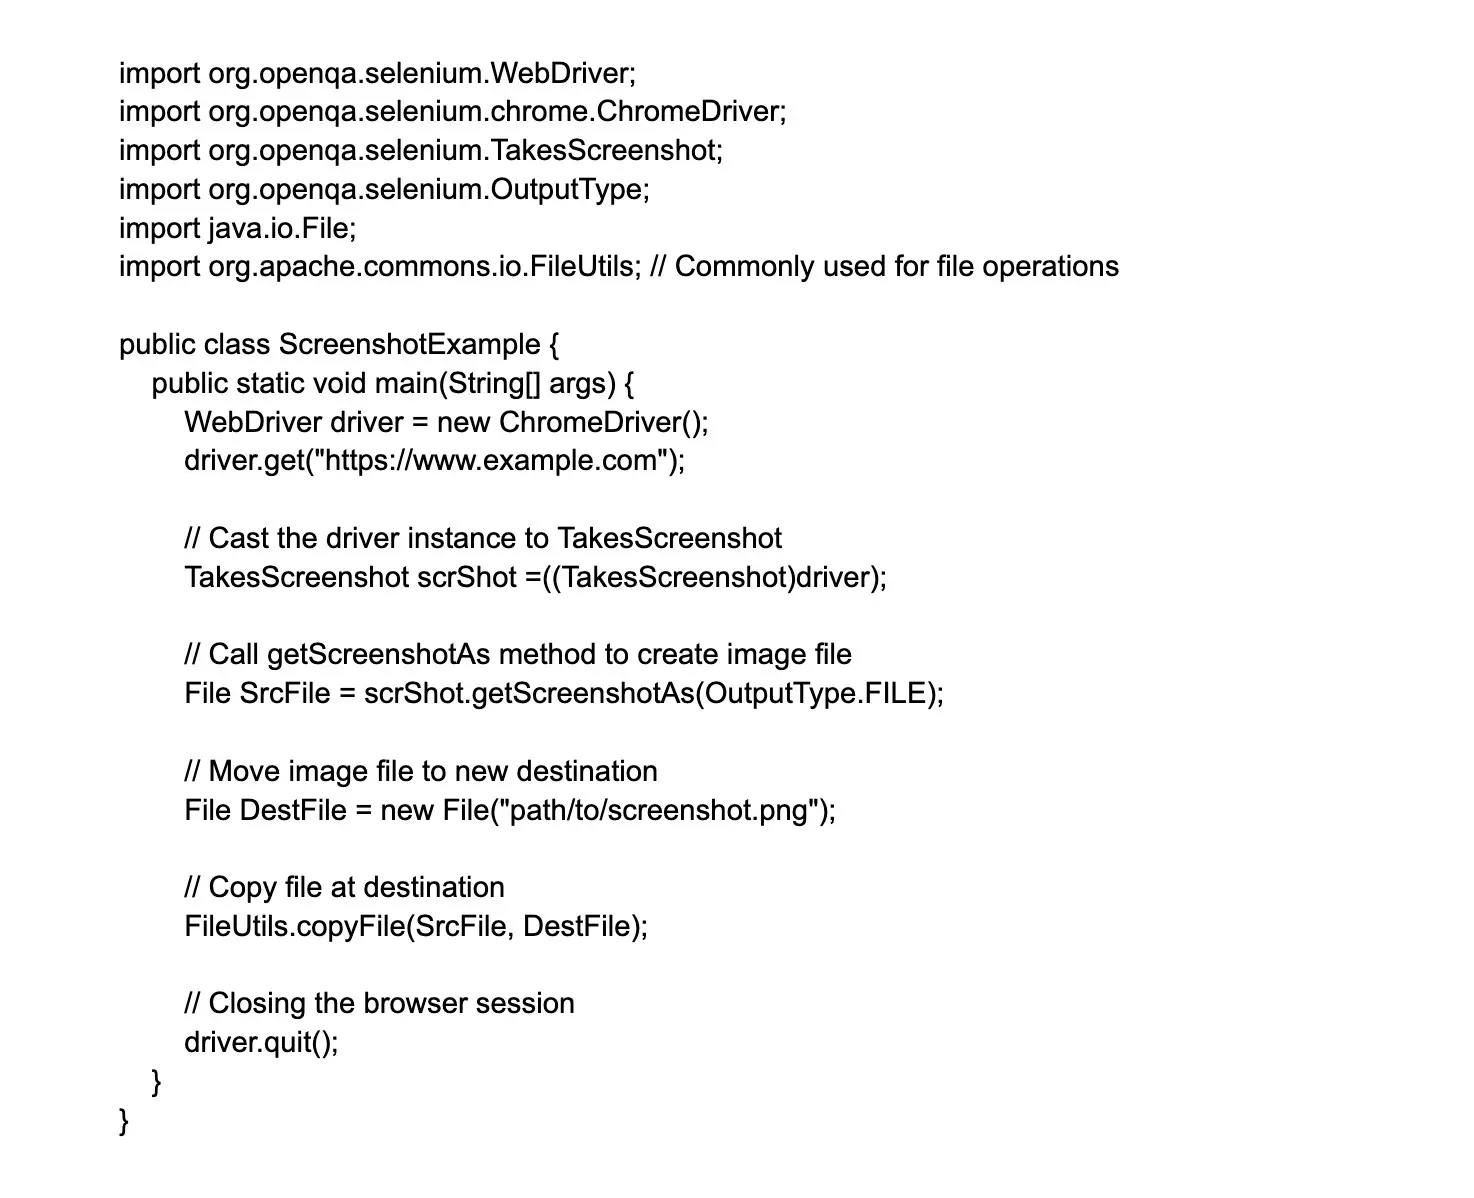
In the example provided, the image will be saved to the specified path. You can modify the file path to include a timestamp to ensure unique file names.
For taking the screenshot of a particular element, you would need to locate the element first and then use AShot (a third-party utility) or similar tools as Selenium WebDriver's native capabilities do not directly support capturing a single element.
35.
How to handle dropdowns in Selenium?
- Identify the dropdown element using a unique selector.
- Use the Select class from Selenium to create an object for the dropdown.
- Use the object's methods to interact with the dropdown options.
To select an option by its visible text, use the selectByVisibleText method.
To select an option by its value attribute, use the selectByValue method.
To select an option by its index, use the selectByIndex method.
- After selecting an option, you can verify if it's selected using the isSelected method.
36.
How to check which option in the dropdown is selected?
To check which option in a dropdown is selected using Selenium, you can use the Select class provided by the Selenium WebDriver API. Here's an example code snippet in Java:

Replace "myDropdown" with the actual ID of your dropdown element. The code first locates the dropdown element using driver.findElement() and wraps it in a Select object. It then retrieves the selected option as a WebElement using the getFirstSelectedOption() method. You can obtain the text that the user sees with getText() or the value attribute with getAttribute("value"), depending on what is relevant for your scenario.
37.
How can we check if an element is getting displayed on a web page?
- Inspect element: Right-click on the page and select "Inspect". This will open up the browser's developer tools, where you can see the HTML code. Look for the element in the code and check if it has any styling that might be making it hidden.
- CSS properties: Use the display property in CSS to check if an element is set to "none". If it is, then it is not being displayed.
- JavaScript/jQuery: Use JavaScript or jQuery to select the element and check if its visibility is set to "hidden" or "visible".
- Automated tests: Use tools like Selenium or Cypress to write automated tests that can check if an element is displayed on a web page. These tools provide functions like isDisplayed() to check the visibility of an element.
38.
How can we check if an element is enabled for interaction on a web page?
To check if an element is enabled for interaction, you can use the isEnabled() method in Selenium WebDriver. First, you need to locate the element using appropriate locators like ID, class, or XPath. Once you have the element, you can use the isEnabled() method to check if it is enabled or not.
This method returns a boolean value - true if the element is enabled for interaction, and false if it is disabled. You can then use this information in your automation script to perform relevant actions based on the element's enabled state.
39.
What is the difference between driver.findElement() and driver.findElements() commands?
findElement() and findElements() are two commands in Selenium WebDriver used to locate web elements on a web page. The main difference between them is that findElement() returns a single WebElement object, representing the first element matching the given locator strategy, while findElements() returns a list of WebElements, representing all the elements found.
So, if you want to interact with only one matching element, you should use findElement(). However, if you are looking for multiple matching elements, you should use findElements() to get all the matching WebElements and then perform the intended action on each element in the array.
40.
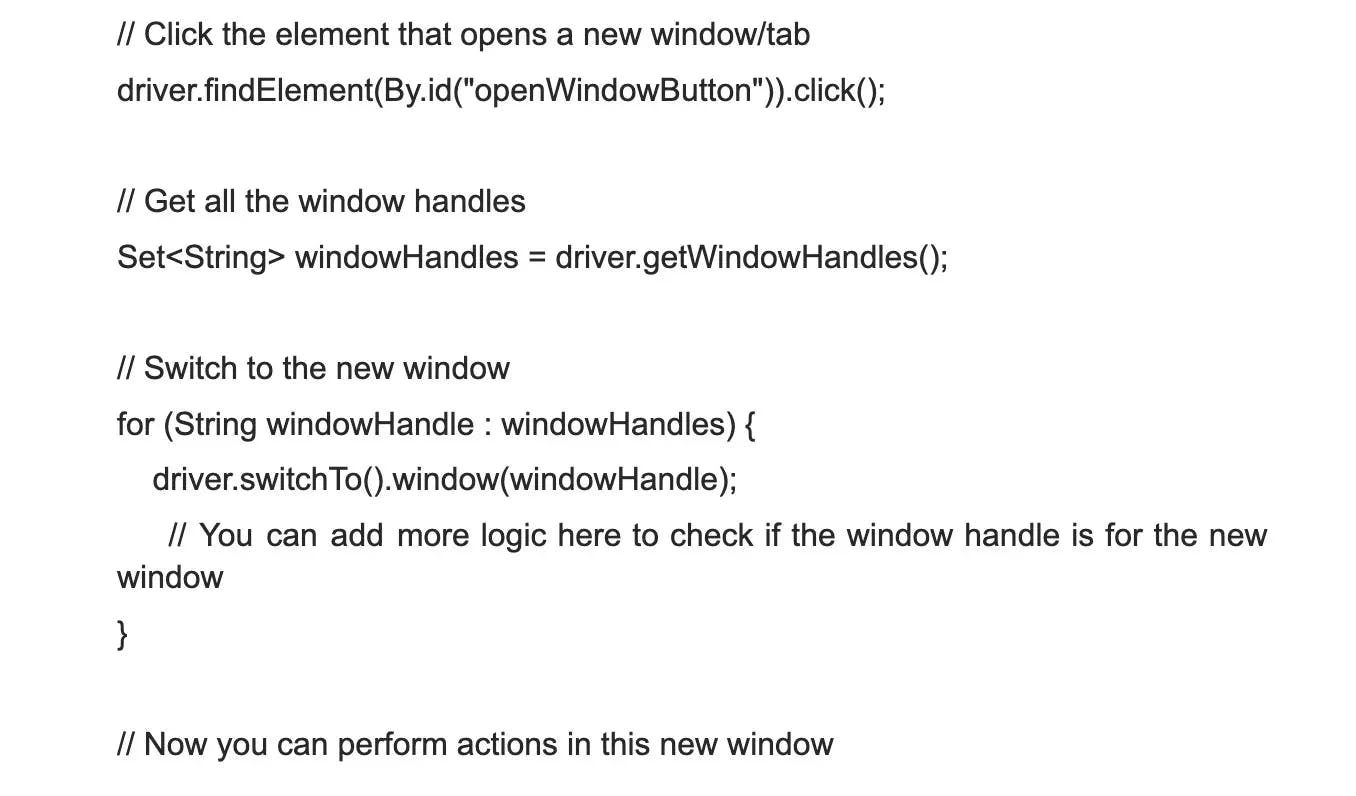
How can we handle window UI elements and window POP-ups using Selenium?
When working with browser-based window pop-ups and new window tabs using Selenium WebDriver, you can handle them using the provided mechanism for window switching. However, for native OS window elements and system pop-ups, Selenium would require the help of third-party tools like AutoIt (for Windows) or Robot (Java built-in class for simulating native OS actions). Below are some steps on how to handle browser window operations with Selenium:
Switching to a New Window/Tab: After an action causes a new window or tab to open, you can switch to it using driver.switchTo().window(windowHandle). You will need to identify the window handle of the new window.
Closing a Window/Tab: To close the current window or tab that WebDriver is focused on, use driver.close().
// Close the current window/tab
driver.close();
Switching Back to the Parent Window: After performing actions in the new window, switch back to the parent window using its window handle.
// Switch back to the original window
driver.switchTo().window(originalWindowHandle);
Interacting with Pop-up Element: If the pop-up is browser-generated (like a JavaScript alert), you can interact with it by switching to the alert.
// Switch to alert
Alert alert = driver.switchTo().alert();
// Accept the alert (click OK)
alert.accept();
For non-browser pop-ups or native window UI elements, you will need to use third-party tools as Selenium cannot interact with these directly.
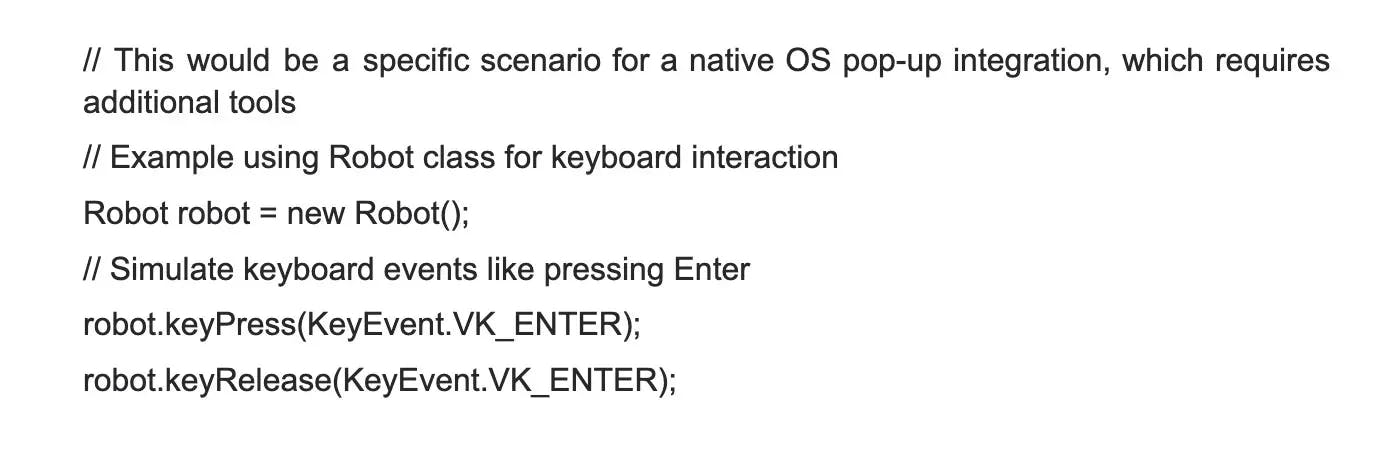
41.
What is Robot API?
The Robot API is a powerful tool for automating tasks in software development and testing. It provides a set of functions and methods that can interact with the user interface of applications, allowing you to automate actions such as clicking buttons, entering text, and verifying the state of the application.
With the Robot API, you can write scripts that simulate user interactions, enabling you to automate repetitive and time-consuming tasks. This API is commonly used in robotic process automation (RPA) and test automation, providing developers with the flexibility to create efficient and reliable automation solutions.
42.
How to do file upload in Selenium?
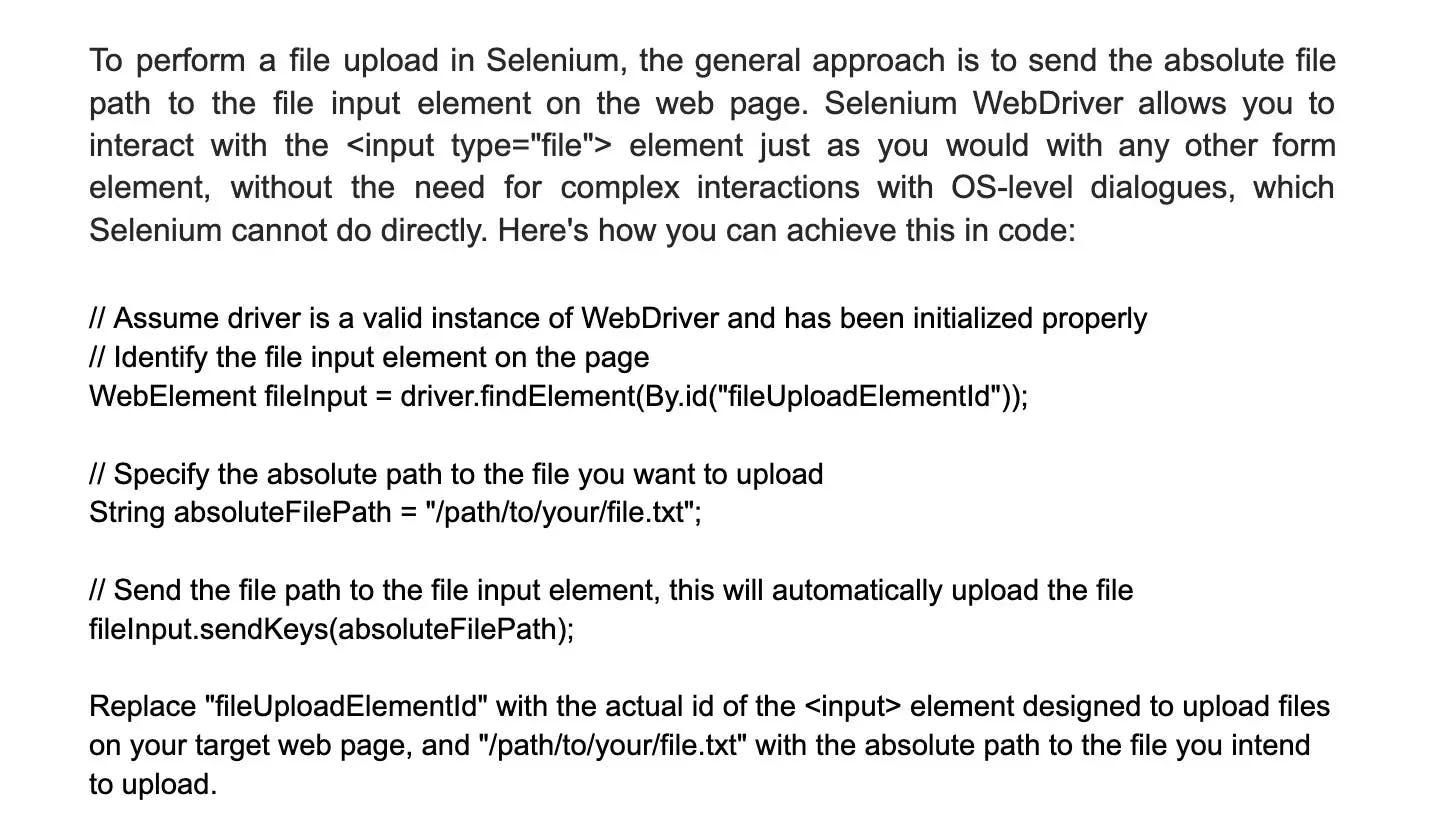
Ensure that the web application does not rely on native OS dialogue boxes for file uploads, as this would require additional tools or libraries to interact with, such as AutoIt or the java.awt.Robot class in the case of Java, because Selenium alone can only interact with web page elements. Using the sendKeys() method to specify the file path directly into a file input element is the recommended approach and works with most browsers and operating systems, simplifying the automation of file uploads in Selenium tests.
43.
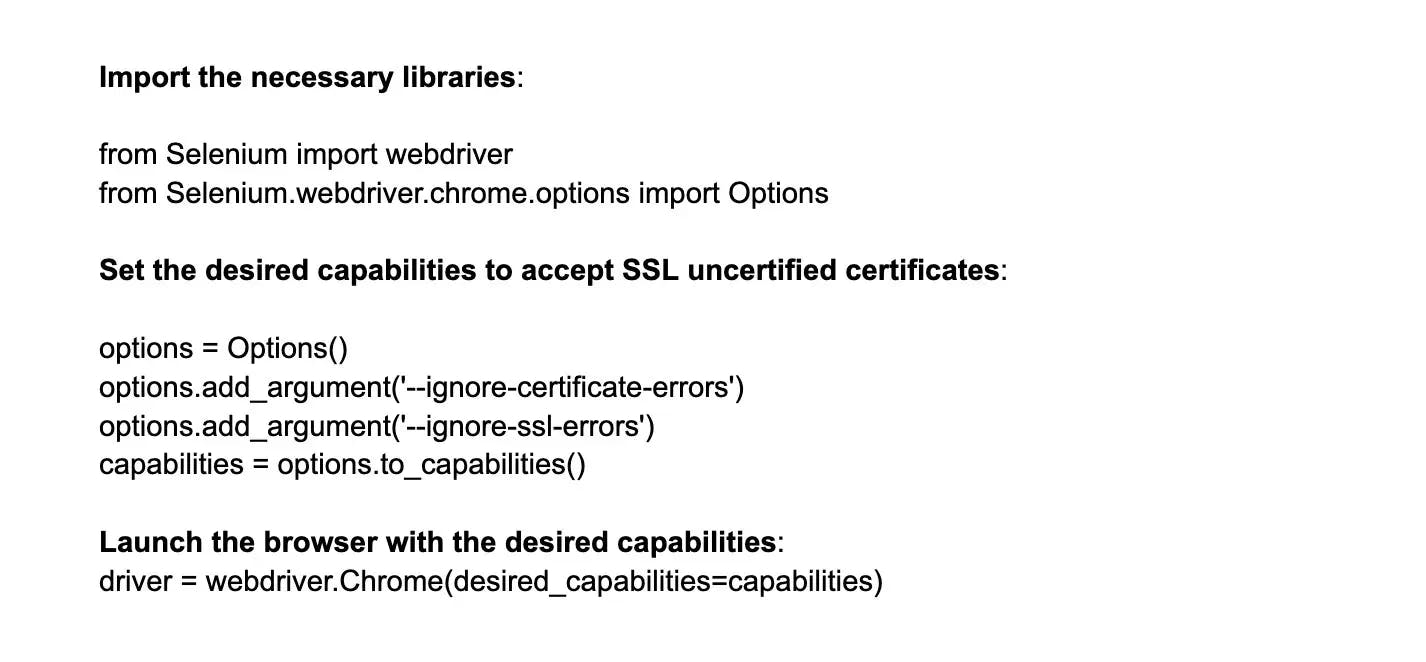
How to handle the HTTPS website in Selenium or how to accept the SSL untrusted connection?
44.
How to do drag and drop in Selenium?
- Identify the source element that you want to drag.
- Identify the target element where you want to drop the source element.
- Create an instance of the Actions class from Selenium.
- Use the dragAndDrop() method of the Actions class to perform the drag and drop operation.
- Pass the source element as the first argument and the target element as the second argument to the dragAndDrop() method.
- Finally, call the perform() method to execute the drag and drop operation.
45.
How to execute JavaScript code in Selenium?
To execute JavaScript code in Selenium, you can use the execute_script method provided by the WebDriver interface. This method allows you to directly execute JavaScript code within the context of the current browser window.
Here's an example of how you can use execute_script:
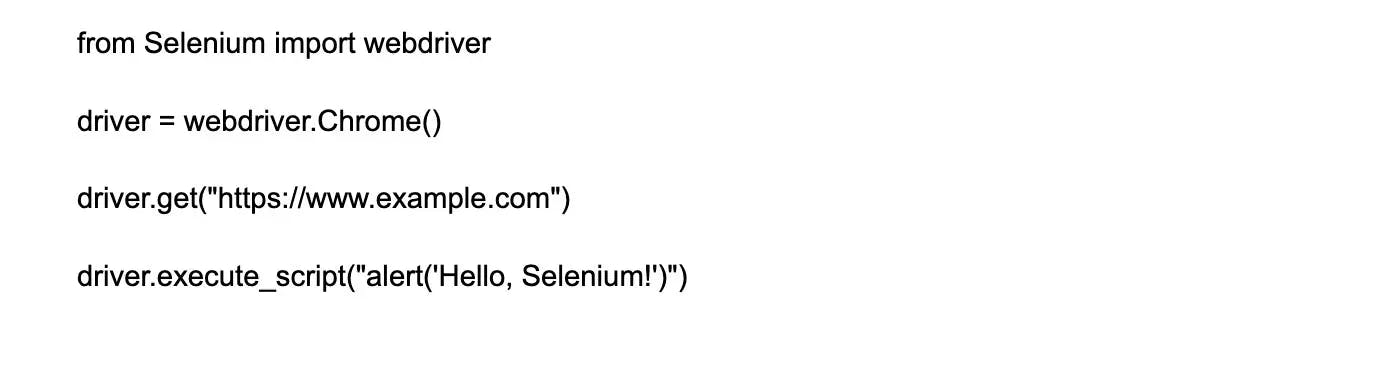
In the above example, the execute_script method is used to execute the JavaScript code alert('Hello, Selenium!'), which displays an alert box with the message "Hello, Selenium!" in the browser.
This method allows you to interact with JavaScript code and manipulate the web page dynamically using Selenium.
46.
How to handle alerts in Selenium?
- Use the switchTo() method to switch to the Alert interface in Selenium.
- Use the alertIsPresent() method to check if an alert is present.
- Use the getText() method to retrieve the text from the alert.
- Use the accept() method to accept the alert.
- Use the dismiss() method to dismiss the alert.
- Use the sendKeys() method to enter text into a prompt alert.
47.
What is HtmlUnitDriver?
HtmlUnitDriver is a web driver implementation for Selenium WebDriver that simulates the web browser's behavior without any graphical user interface. It is a headless browser, which means it can access web pages and execute javascript without opening a visible browser window, making it an efficient choice for running tests.
HtmlUnitDriver works by sending HTTP requests to the web server and receiving responses like a web browser would. It's mainly used for automating web pages testing and web crawling. HtmlUnitDriver is suitable for developers who want to perform non-visual testing and are seeking faster test execution times without requiring a browser window.
48.
How to handle hidden elements in Selenium WebDriver?
When dealing with hidden elements in Selenium WebDriver, there are a few things to keep in mind. First, it's important to check whether the element is actually hidden or if it's simply not present on the page. If it's hidden, you can use Selenium's built-in JavaScriptExecutor to modify the CSS properties of the element and make it visible.
Alternatively, you can try clicking on the parent element to trigger the visibility of the child element. Another option is to use the ExpectedConditions class to wait until the element becomes visible before attempting to interact with it. Finally, if all else fails, you may need to modify the application code to make the element visible by default.
Tired of interviewing candidates to find the best developers?
Hire top vetted developers within 4 days.
Advanced Selenium interview questions and answers
1.
What is Page Object Model or POM? State its advantages.
Page Object Model (POM) is a design pattern used in test automation that organizes web page objects into separate classes, making the code more modular and maintainable. Each class corresponds to a specific web page and contains methods and properties related to that page.
The advantages of POM include improved code reusability, increased test code maintainability, easier collaboration between developers and testers, and enhanced readability of test scripts. By encapsulating the page objects, any changes in the UI can be easily managed within the corresponding class.
Additionally, POM promotes a more structured and organized approach to test automation.
2.
What are the best practices for structuring Page Object Model classes?
When structuring Page Object Model (POM) classes, there are a few best practices to keep in mind to ensure a maintainable and scalable framework. The first is to have a separate class for each page, with the page's elements and associated actions encapsulated within it. Additionally, header and footer elements can also be stored in separate classes shared across multiple pages.
It's also important to keep methods and element locators organized within their respective page classes. This can be achieved by grouping them by function or location on the page.
Finally, inheritance and interfaces can be used to promote code reuse and reduce redundancy, making the framework more flexible and easy to maintain. By following these best practices, creating and maintaining a solid POM framework becomes much more achievable.
3.
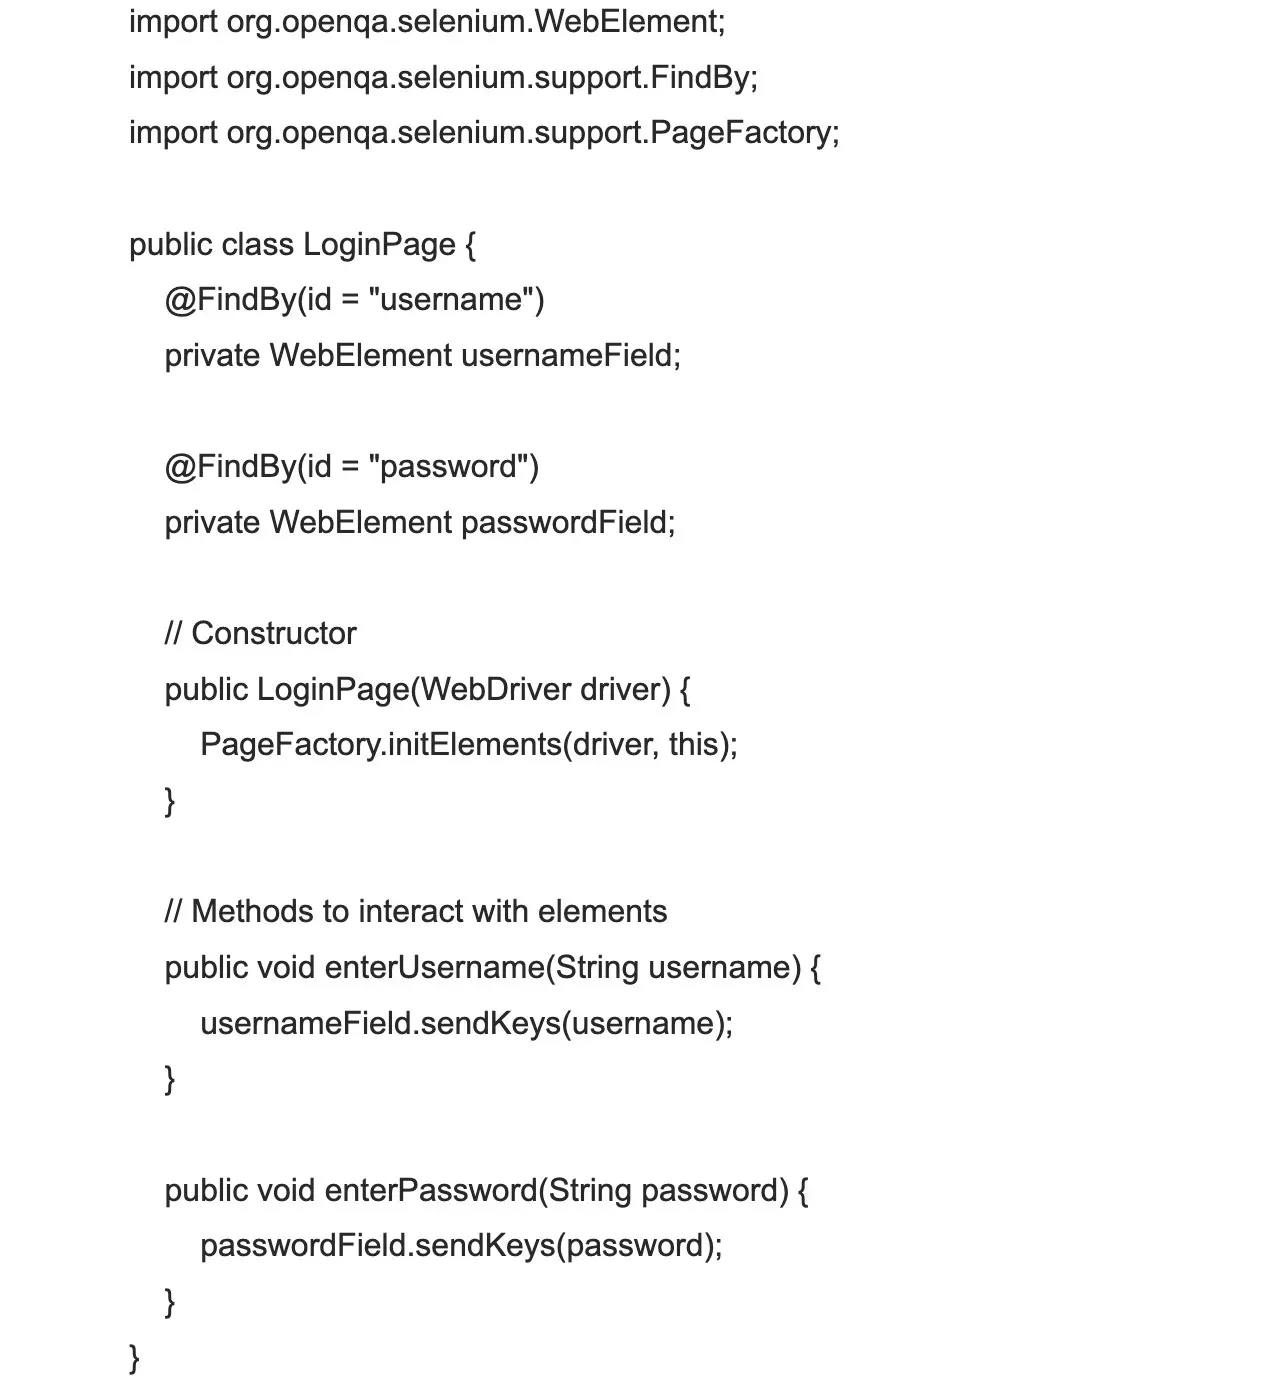
What is Page Factory?
Page Factory is a design pattern used in Selenium WebDriver to create Page Object Models (POM). It aims to enhance the readability and maintainability of test scripts by providing an elegant way to initialize elements on a web page.
With Page Factory, we can use annotations like @FindBy to locate elements and eliminate the need for driver.findElement(). It also allows us to initialize elements only when they are needed, improving performance.
Additionally, we can define methods and actions specific to a page using this pattern. Overall, Page Factory simplifies the process of creating and maintaining page objects in automation testing.
4.
How can you create an Object Repository in Selenium?
Creating an Object Repository in Selenium is a way to manage web elements in a centralized location, making tests easier to maintain and reducing code duplication. While there are various ways to implement an Object Repository, one of the most common and efficient methods is through the use of the Page Object Model (POM) enhanced by Page Factory. Here is how it can be done:
- Identify the Web Elements: Assess the web pages under test to identify all the UI elements that your tests will interact with, such as text boxes, buttons, drop-downs, and links.
- Page Object Model (POM): Structure your code using POM. Create classes that represent each page of your application. Within each page class, represent every identified web element as a field.
- Page Factory Annotations: Utilize Page Factory provided by Selenium to instantiate each WebElement field. Use annotations like @FindBy to define how Selenium locates these elements. An example is shown below:
- Maintain Uniqueness: Define a unique and descriptive naming convention for your web element fields so that anyone reading the code can understand what element it corresponds to.
- Helper Methods: Within each page class, create methods that perform actions on these elements. This encapsulates behavior and reduces repeated code.
- Integration: Reference these page classes and methods in your test scripts. By doing so, any changes to an element's locator need only be updated in one place.
By following these steps and applying the Page Object Model with Page Factory, you create a robust Object Repository in Selenium that is maintainable and scalable.
5.
How do you manage the Object Repository in a large-scale project?
- Create a logical folder structure: Categorize objects based on functionality and application modules to make it easier to locate and maintain them.
- Use naming conventions: Establish clear and consistent naming conventions for objects to ensure easy identification.
- Regularly review and clean up: Periodically review the Object Repository and remove any unused or redundant objects to maintain efficiency.
- Version control: Implement a version control system to track changes and avoid conflicts when multiple team members are working on the repository simultaneously.
- Document and communicate: Maintain documentation on how to use the Object Repository and regularly communicate any changes or updates to the team.
6.
What is a keyword-driven framework?
A keyword-driven framework is a software testing framework that allows testers to write test scripts using a set of pre-defined keywords. These keywords represent the actions or operations that need to be performed during the test.
Testers can simply combine these keywords to create test cases without having to write complex code. This approach makes test automation accessible to testers who may not have programming expertise. The framework separates the test data from the test logic, making it easy to maintain and update the test scripts.
Overall, a keyword-driven framework promotes reusability, maintainability, and removes the technical barriers for manual testers to transition into automation.
7.
How can we ensure the security of a Selenium hub in a distributed environment, and what measures can we take to prevent unauthorized access?
There are several precautions that can be taken to ensure the security of a Selenium hub in a distributed environment. One such measure is to secure the hub's network connectivity by using a secure communications protocol such as HTTPS rather than HTTP.
Additionally, access to the hub should be restricted using access control lists (ACLs) and firewalls to prevent unauthorized access from outside the network. Furthermore, security patches and updates should be applied regularly to ensure that known vulnerabilities are addressed promptly.
Finally, user authentication and authorization can be used to ensure that only authorized users have access to the hub's resources, and these users should be required to use strong passwords and adhere to best practices for securing their accounts.
8.
What is Selenium Grid? Write its advantages.
Selenium Grid is a widely used tool that allows testers to execute automation tests on multiple instances of a web application in parallel, thus saving time and effort. The basic idea behind Selenium Grid is to distribute web application tests across multiple machines to perform tests faster.
Selenium Grid offers several advantages, including the ability to run multiple tests in parallel, distribute test cases across different machines, reduce test execution time, and increase the speed of test execution.
Additionally, it supports multiple browsers and operating systems, facilitating cross-browser and cross-platform testing. Ultimately, by utilizing Selenium Grid in test automation, teams can save valuable time and resources while ensuring comprehensive test coverage across multiple environments.
9.
How do you handle synchronization issues in POM?
Synchronization issues in POM occur when the system under test (SUT) takes longer to perform an action than the test code expects it to. This discrepancy can lead to failed test cases and erratic behavior.
To avoid this, POM uses the "Explicit Wait" mechanism. This mechanism tells Selenium WebDriver to wait for a certain condition to occur before proceeding to the next step. One common approach is to use the "ExpectedConditions" class along with various "wait" methods such as "elementToBeClickable" or "visibilityOfElementLocated".
This way, POM ensures the synchronization between the test code and the SUT, resulting in stable and reliable test cases.
10.
How would you start a Selenium Grid hub and what are the required parameters?
- Install JDK (Java Development Kit) on your machine.
- Download the Selenium Server standalone jar file from the official Selenium website.
- Open a command prompt or terminal window.
- Navigate to the directory where you have downloaded the Selenium Server jar file.
- Run the following command to start the Selenium Grid hub:
java -jar Selenium-server-standalone.jar -role hub
Note: Replace Selenium-server-standalone.jar with the actual filename of the Selenium Server jar file.
11.
Can we have multiple hubs in Selenium Grid? If so, what is the use case for having multiple hubs?
Traditionally, Selenium Grid is structured around a single hub that manages multiple nodes. However, it is technically possible to have multiple independent instances of Selenium Grid, each with its own hub and nodes. This type of setup isn't typically referred to as having multiple hubs within a single Grid but running parallel Grids.
Use Cases for Multiple Independent Selenium Grid Instances:
- Geographical Distribution: In large organizations, different teams spread across various locations might maintain their own Grid instance to minimize latency and achieve faster test execution.
- Dedicated Resources: Teams working on separate projects may set up their own Grid instances to ensure that their automated testing demands are met without contention for resources.
- Environment-Specific Testing: Different Grid instances can be configured with nodes that have unique environment settings, such as distinct browser versions or operating systems, facilitating targeted testing for specific project requirements.
12.
Explain the line of code Webdriver driver = new FirefoxDriver();.
The line of code "Webdriver driver = new FirefoxDriver();" declares a variable named "driver" of type "WebDriver" and assigns it a new instance of the "FirefoxDriver" class.
This code is using Selenium WebDriver, a popular tool for automating browser interactions, and specifically, it is creating an instance of the FirefoxDriver, which is a specific implementation of the WebDriver interface for automating Firefox browsers.
By utilizing this code, you can set up and control a Firefox browser instance programmatically through the "driver" variable. It provides access to various methods and properties to navigate, interact with web elements, and perform automated tasks on web applications using the Firefox browser.
13.
What is the purpose of creating a reference variable- ‘driver’ of type WebDriver instead of directly creating a FireFoxDriver object or any other driver’s reference in the statement Webdriver driver = new FirefoxDriver();?
Creating a reference variable of type WebDriver instead of directly using specific driver objects like FirefoxDriver enhances code flexibility and maintainability. This approach adheres to abstraction principles, allowing easy switching between browser drivers. It promotes interface-based programming, aiding in code reusability and modularity.
By utilizing WebDriver as a common reference, codebase remains adaptable to changes in driver implementations, improving overall test efficiency and making the code more dynamic through the application of polymorphism and dependency injection techniques.
14.
How do you handle error messages returned by an API in Selenium?
It's essential to clarify that Selenium WebDriver focuses on browser automation and does not directly handle API responses. However, in a test framework that combines Selenium with API testing, you may need to work with error messages returned by APIs. Here’s how you can manage them effectively:
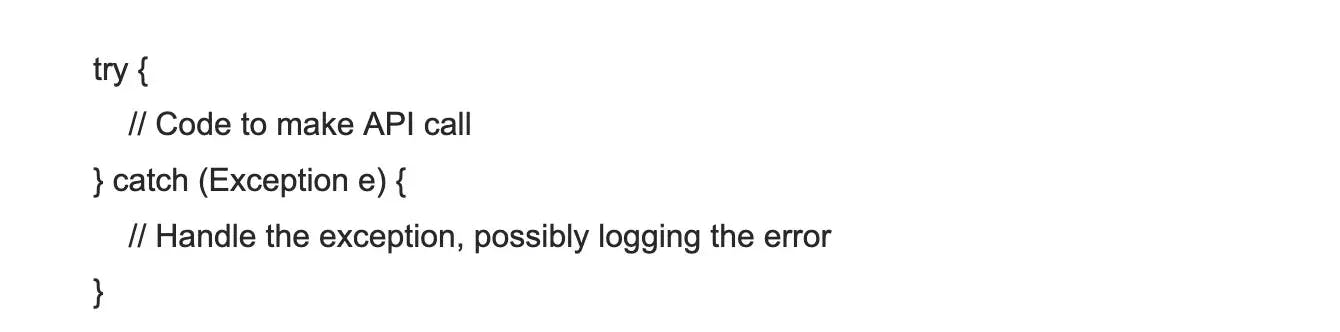
Exception Handling: If an API call within your test script throws an exception, use try-catch blocks to handle it. This ensures that even when an API request fails, your Selenium test can either continue with alternative actions or fail gracefully with a clear error message.
Assertions: When testing API responses, assertions are crucial. Use assertion libraries or testing frameworks to compare the actual response of the API with the expected outcome. If the response includes an error message, the assertion will fail, and the test report will reflect this.
assertEquals(actualResponse, expectedResponse, "API response did not match the expected value.");
Logging Errors: Implement logging within your test scripts to record error messages, statuses, or unexpected behavior. This documentation is invaluable for debugging and can be used to improve the reliability of your API integration.
While Selenium itself doesn't handle API error messages, integrating it with tools like REST Assured, Postman (for manual testing), or other API testing libraries can provide a comprehensive testing approach that includes both UI and API validation.
15.
How do you integrate an API test suite with a Selenium test suite?
To integrate an API test suite with a Selenium test suite, you can follow these steps:
- Install and set up the necessary libraries and frameworks for both API testing (e.g., Postman, Requests library) and Selenium testing (e.g., Selenium WebDriver).
- Create separate test suites for API testing and Selenium testing.
- Define the required test cases for each suite, ensuring that they cover the desired functionalities.
- Write the test cases for API testing using the appropriate API testing tools and frameworks.
- Write the test cases for Selenium testing using Selenium WebDriver to interact with the web application.
- Depending on your testing strategy, you can either run the two test suites separately or combine them into a single test suite.
- If combining them, ensure that the test cases are grouped accordingly, so that API tests are executed first before running any Selenium tests.
Finally, run the integrated test suite, which will execute both the API and Selenium tests, allowing you to validate both the API and the UI functionalities of your application.
16.
How do you test APIs that are not publically available using Selenium and API calls?
To test non-public APIs (also referred to as private APIs) within a Selenium test suit, take the following steps:
- Environment Configuration: Ensure the test environment has secure access to the non-public API. This might include setting up VPNs, adjusting firewall settings, or using other methods to safely expose the non-public APIs to your test environment without making them publicly accessible.
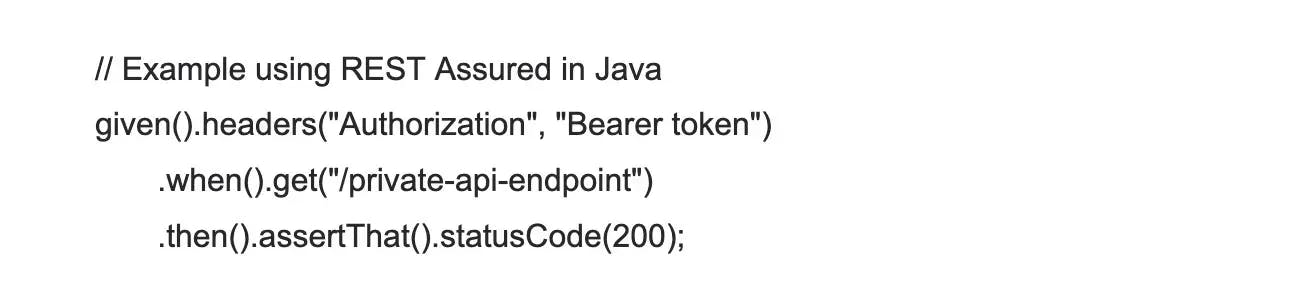
- API Testing Tool Setup: Instead of using Selenium, you would utilize an API testing tool or framework suited for this task, such as REST Assured for Java, HTTPClient for .NET, or other libraries that allow you to make HTTP requests and handle API responses.
- Write API Tests: Using your chosen API testing tool, write tests to verify the correctness of the API endpoints. This may involve setting proper authentication headers, sending requests to the API, and validating the responses received.
- Browser Automation for API Testing: If the API is tightly coupled with a web application (and you wish to simulate user behavior that starts with UI interaction using Selenium), you'll need to perform actions with Selenium WebDriver to trigger the API calls from the web application.
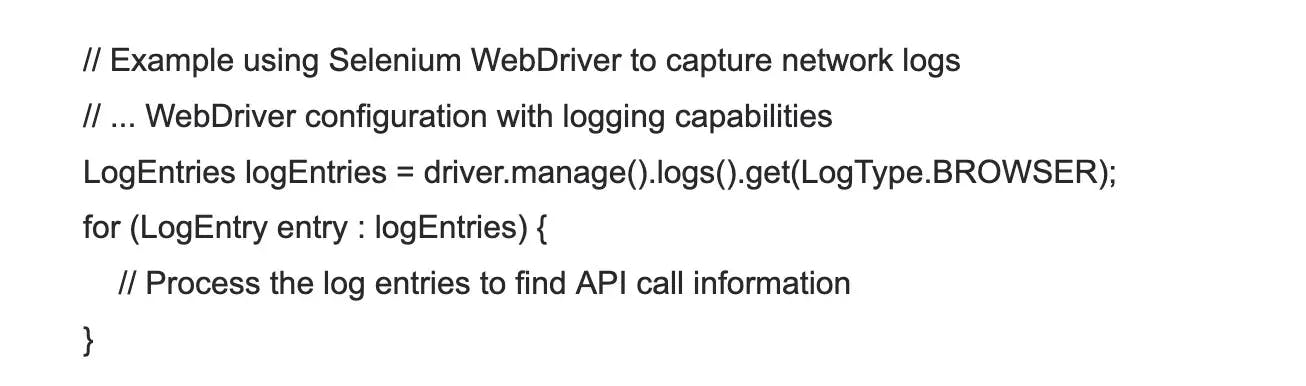
- Intercept and Validate API Calls (If Necessary): For cases where you need to directly validate the API call made by the web application, you might use tools like Selenium's WebDriver to capture network requests or a proxy, such as BrowserMob Proxy, to capture and inspect the HTTP requests and responses
- Secure Test Data Handling: Ensure that all test data and credentials related to the non-public APIs are securely managed and not exposed, especially in shared environments or version control systems.
- Combine Results: You may want to have a reporting mechanism that aggregates the results from both the API tests and the Selenium tests if they are part of a single test suite, to provide a comprehensive view of the application's health
While Selenium automates browsers and can simulate user interactions that might trigger API calls, it's not designed to handle direct API testing. For API testing, especially for non-public APIs, a combination of secure environment setup and dedicated API testing tools is recommended.
17.
What is DataProvider in TestNG, and how to use it to run the same tests with different sets of data?
The DataProvider feature in TestNG is used to run the same test method multiple times with different sets of data. It allows us to parameterize our tests and execute them with various inputs. Here's how you can use DataProvider to run tests with different sets of data:
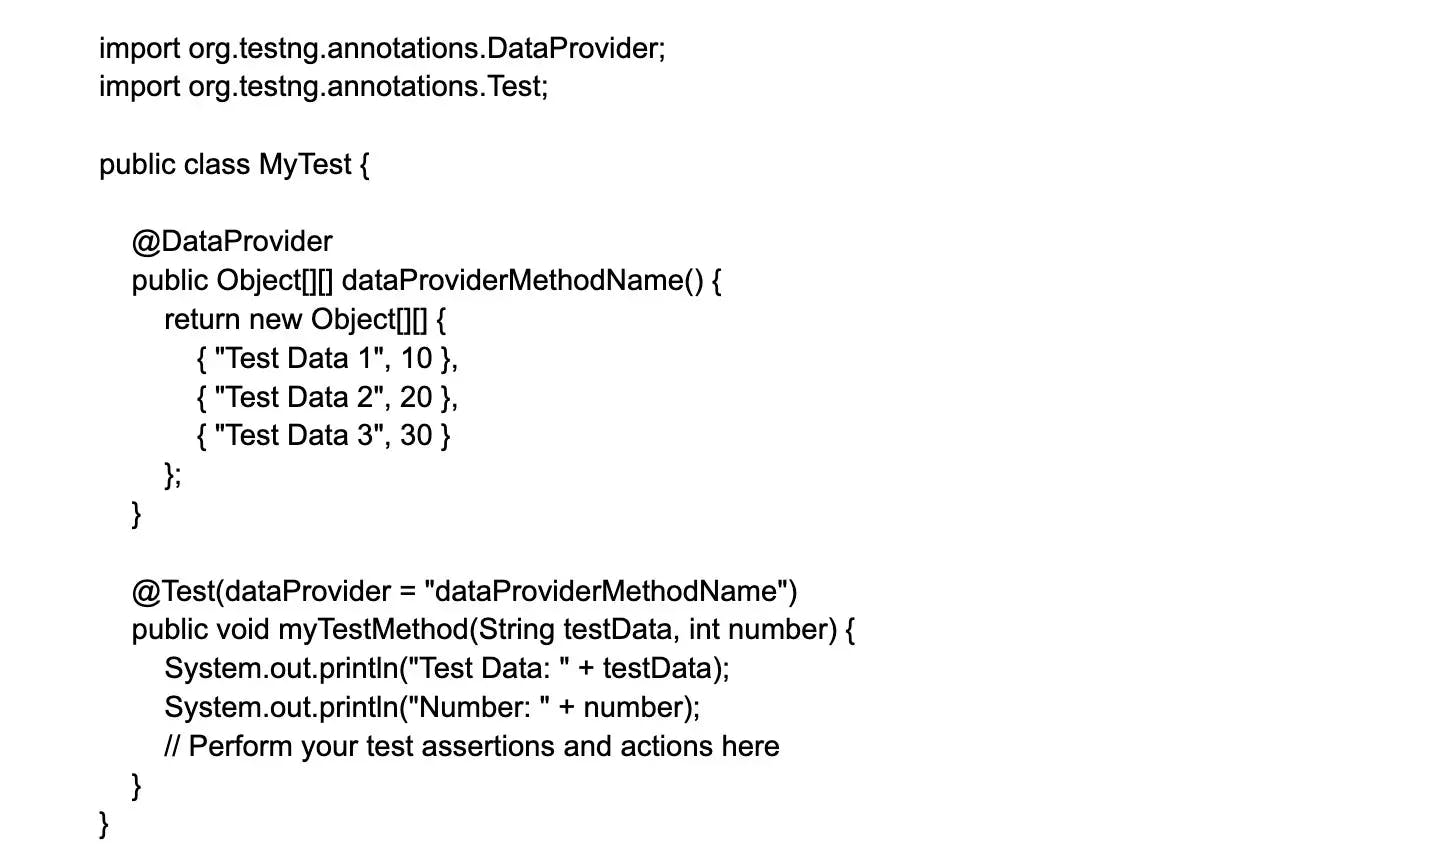
- Define the DataProvider method: Create a DataProvider method that returns a 2D array or an Iterator<Object[]> of test data. Each row of the array or each object in the iterator represents one set of test data.
- Annotate the test method: Annotate the test method with @Test(dataProvider = "dataProviderMethodName") and specify the name of the DataProvider method using the dataProvider attribute.
- Write the test method: Implement the test method and define the number and types of the parameters based on the data you want to pass. The parameters should match the number and types of columns in your test data.
- Access the test data: Inside the test method, use the parameters to access the test data for each iteration.
Here's an example to demonstrate the usage of DataProvider:
18.
What are some advantages of TestNG?
Here are some advantages of using TestNG in Selenium:
- Parallel Test Execution: TestNG allows running tests in parallel, which significantly reduces the execution time and increases efficiency.
- Flexible Test Configuration: TestNG supports flexible test configurations through XML files, where test suite, test case, and test data parameters can be customized.
- Test Dependency Management: TestNG provides a mechanism to define test dependencies, ensuring tests are executed in the desired order.
- Enhanced Reporting: TestNG generates comprehensive test reports with detailed information about test failures, enabling quick troubleshooting and analysis.
- Data Driven Testing: TestNG supports data-driven testing, which allows executing test cases with different test data sets, enhancing test coverage and flexibility.
19.
What are commonly used TestNG annotations?
Some commonly used TestNG annotations in Selenium are:
- @BeforeSuite: This annotation marks the entry point of execution and is used to perform generic functions such as setting up and starting Selenium drivers or remote web drivers.
- @BeforeMethod: This annotation is executed before every @Test annotated method.
- @AfterMethod: This annotation is executed after every @Test annotated method.
- @BeforeClass: This annotation is executed before the first @Test method execution and is only executed once throughout the test case.
- @AfterClass: This annotation is executed after the last @Test method execution and is only executed once throughout the test case.
- @DataProvider: This annotation is used to supply test data to test methods.
- @Test: This annotation is used to specify a test method.
20.
What are some common assertions provided by TestNG?
TestNG provides various types of assertions that you can use in Selenium automation. The below are some of the common assertions that TestNG provides in Selenium.
- assertEquals: Used to compare expected and actual values in Selenium WebDriver. This assertion passes if both the expected and actual values match, else it fails the test case.
- assertNotEquals: Used to compare expected and actual values in Selenium WebDriver. This assertion passes if both the expected and actual values don't match, else it fails the test case.
- assertTrue: Passes if the provided condition is true, else it fails the test case.
- assertFalse: Passes if the provided condition is false, else it fails the test case.
21.
What is the use of the testng.xml file?
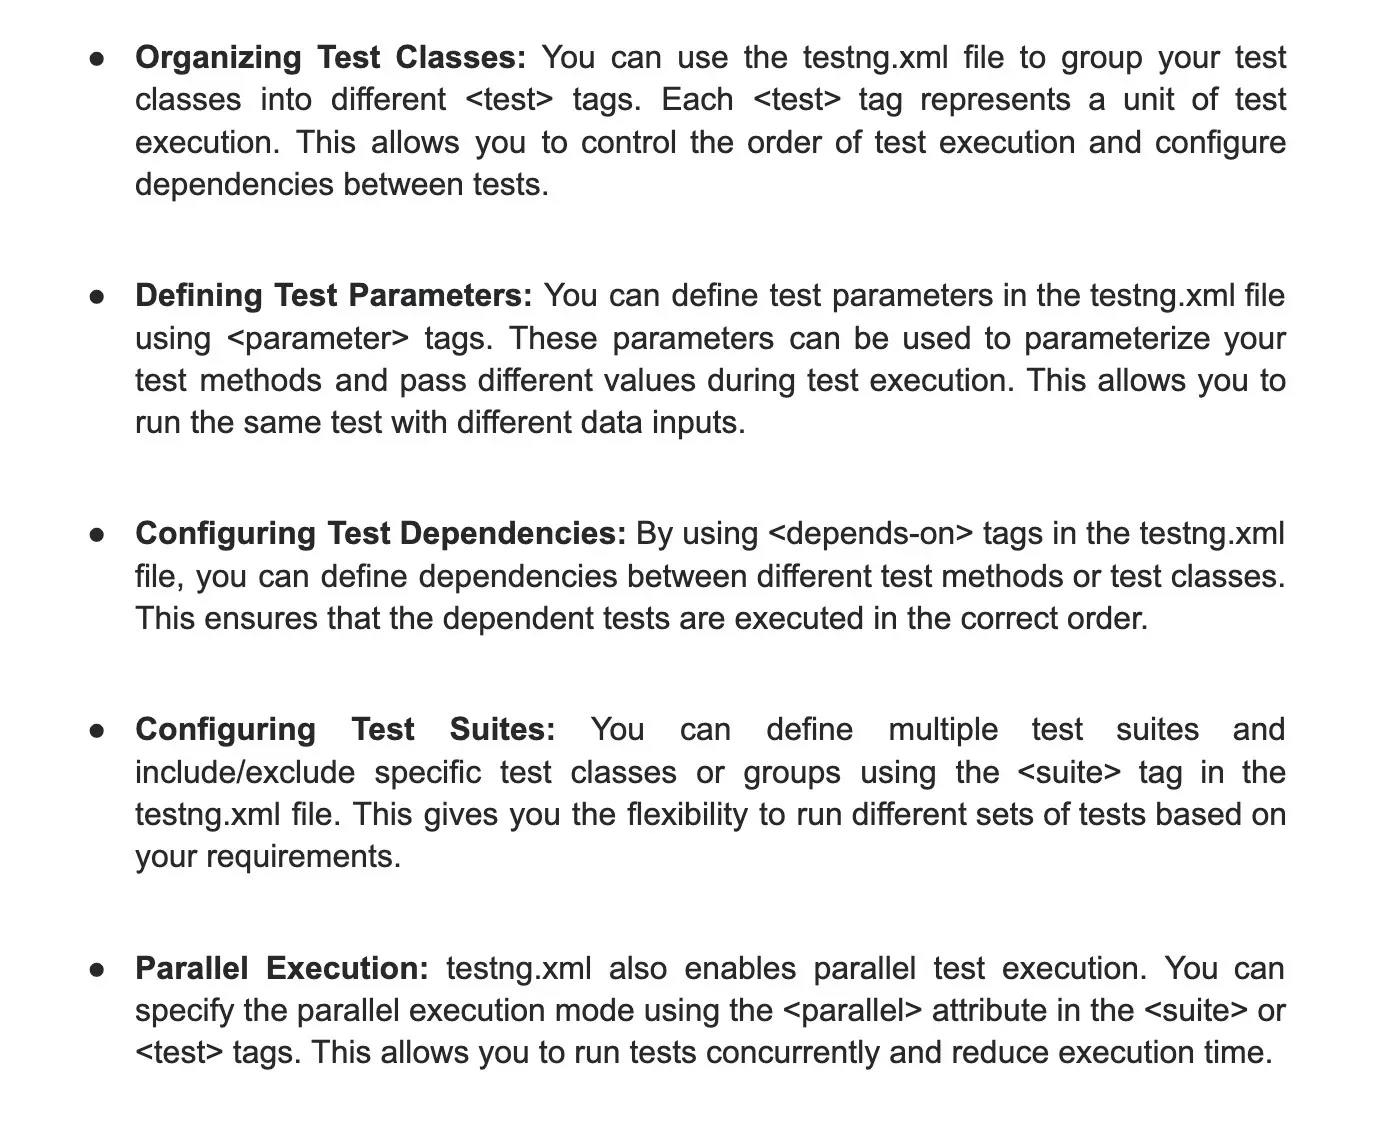
The testng.xml file in Selenium is used as a configuration file for running test suites. It allows you to define various parameters and settings for your test execution.
Here's how you can use testng.xml file in Selenium:
22.
How can we pass the parameter to the test script using TestNG?
To pass parameters to a test script using TestNG in Selenium, you can use the @Parameters annotation.
Here's an example of how to use it:

In this example, the @Parameters annotation is used to define the parameters param1 and param2 that will be passed to the testMethod().
You can also pass parameters through the testng.xml configuration file or using DataProviders. However, using @Parameters annotation is the simplest way to pass parameters to a test script in TestNG.
23.
How can we create a data-driven framework using TestNG?
To create a data-driven framework using TestNG in Selenium, you can follow these steps:
- Set up TestNG in your Selenium project by adding the necessary TestNG libraries to your project.
- Create a separate class for your test case logic where you can define your TestNG test methods. Let's call this class "TestDataDrivenTests".
- Create a data provider method in the TestDataDrivenTests class that will fetch the test data from a data source. The data source can be an Excel file, CSV file, database, or any other source. This data provider method should return a 2-dimensional array or an Iterator<Object[]> containing the test data.
- Use the @DataProvider annotation above the data provider method to specify the name of the data provider.
- In your test method, use the @Test annotation and specify the data provider name as a parameter to fetch the test data.
- Within the test method, use the test data to drive your test case logic. You can use a loop to iterate through the test data and perform the required actions and assertions.
Here's an example code snippet to demonstrate the above steps:
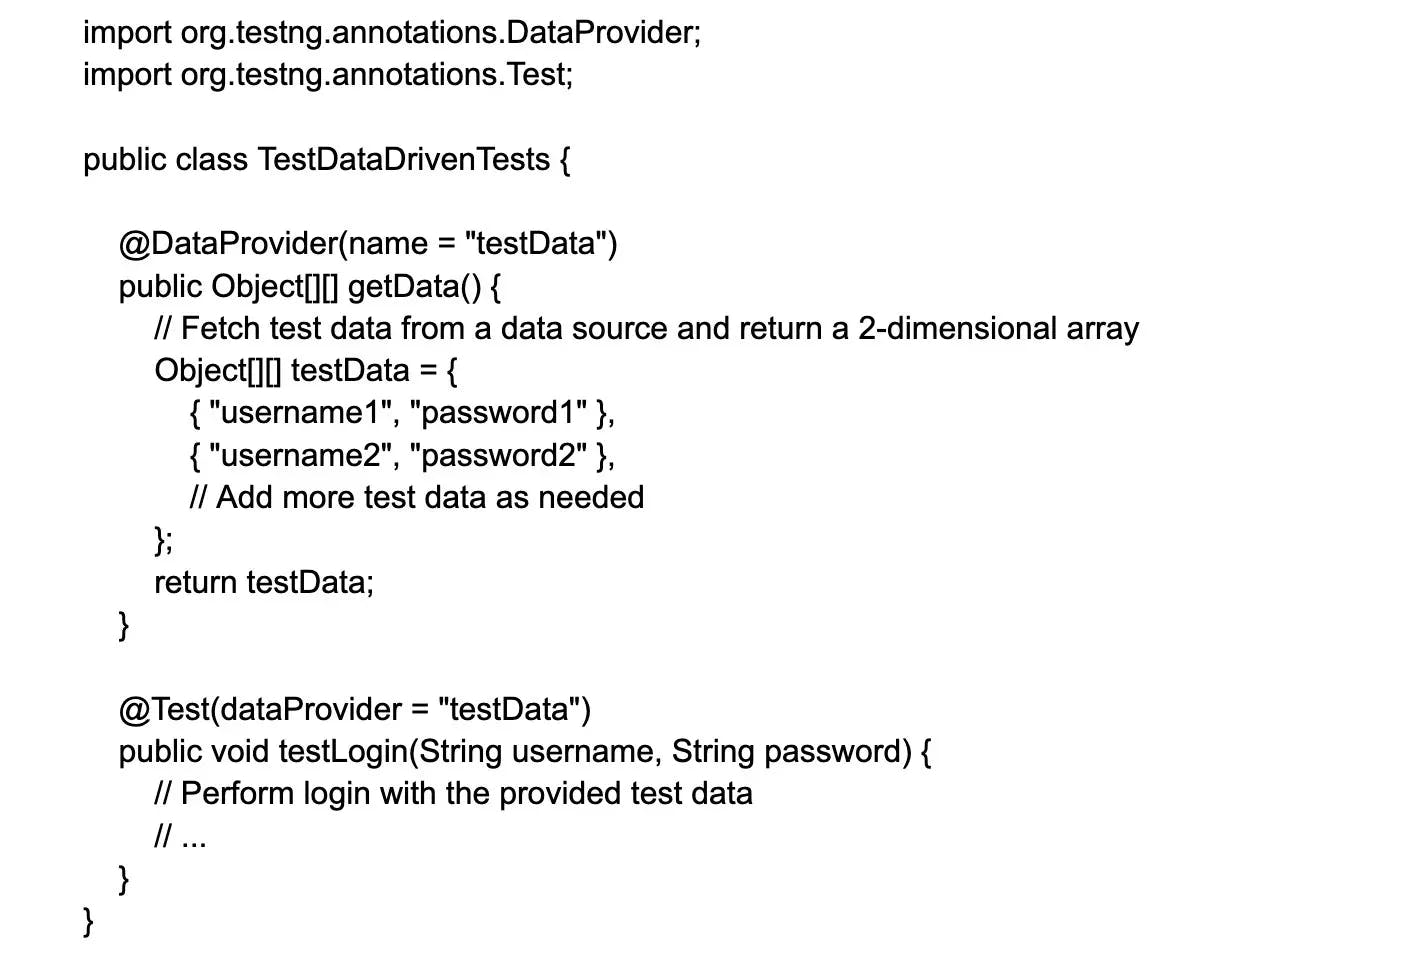
In this example, the test method testLogin is parameterized with the test data fetched from the getData data provider method using the @Test annotation and dataProvider parameter.
You can add additional test methods within the TestDataDrivenTests class and repeat the above steps to create more data-driven tests.
24.
What is the use of @Listener annotation in TestNG?
The @Listener annotation in TestNG is used to define and customize event listeners to monitor the execution of TestNG tests. A listener can be used to perform certain actions before and after the tests being executed, such as taking a screenshot if a test fails or generating a custom report.
Here is an example of how to use the @Listener annotation in a TestNG test:
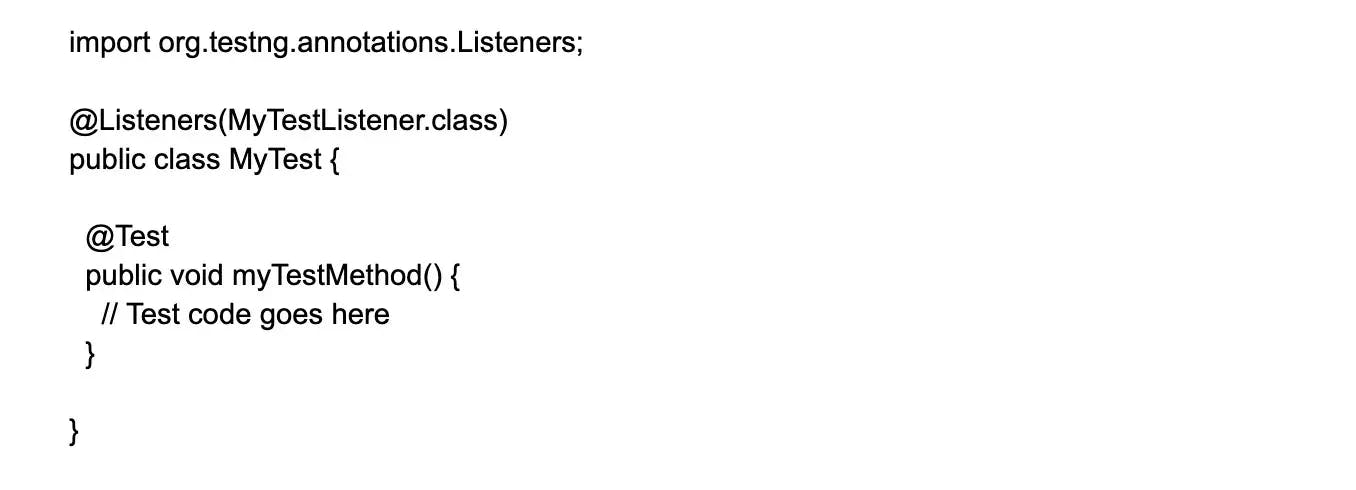
In the above example, MyTestListener class is a custom listener that implements the IInvokedMethodListener and ITestListener interfaces to customize the behavior of TestNG tests. The @Listeners annotation specifies the listener(s) to be used for the current test class.
25.
How can we make one test method dependent on others using TestNG?
To create test method dependencies in TestNG using Selenium, you can utilize the dependsOnMethods attribute. This attribute allows you to specify which test methods should be executed before a particular test method.
Here is an example of how to make one test method dependent on others using TestNG:
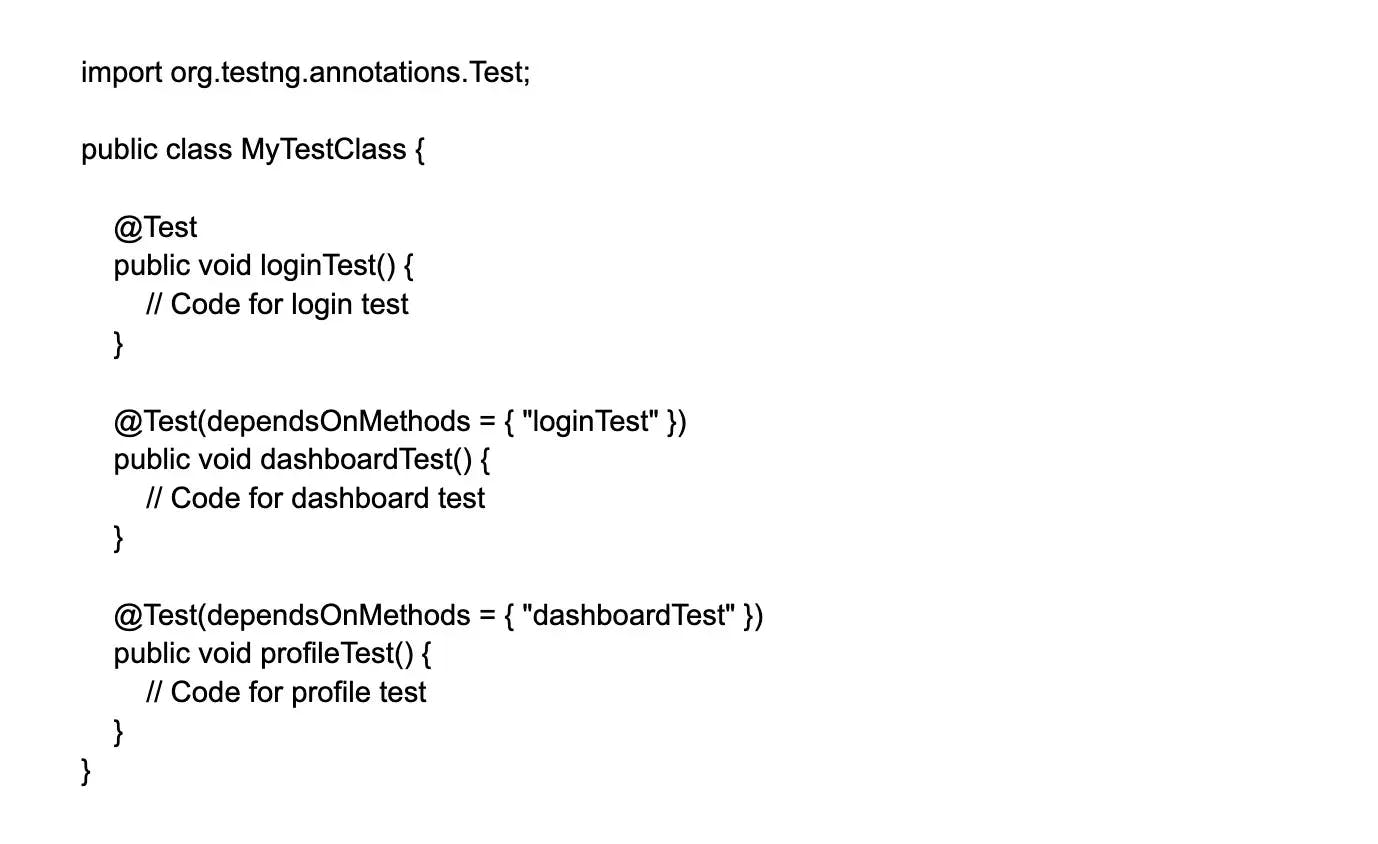
In this example, the dashboardTest method is dependent on the successful execution of the loginTest method. Similarly, the profileTest method is dependent on the successful execution of the dashboardTest method.
By specifying the dependsOnMethods attribute with the appropriate method name(s), you can create these dependencies in your TestNG test class.
26.
How can we set the priority of test cases in TestNG?
In TestNG, you can set the priority of test cases by using the priority attribute in the @Test annotation.
Here is an example of how you can set the priority of test cases in TestNG using Selenium in Java:
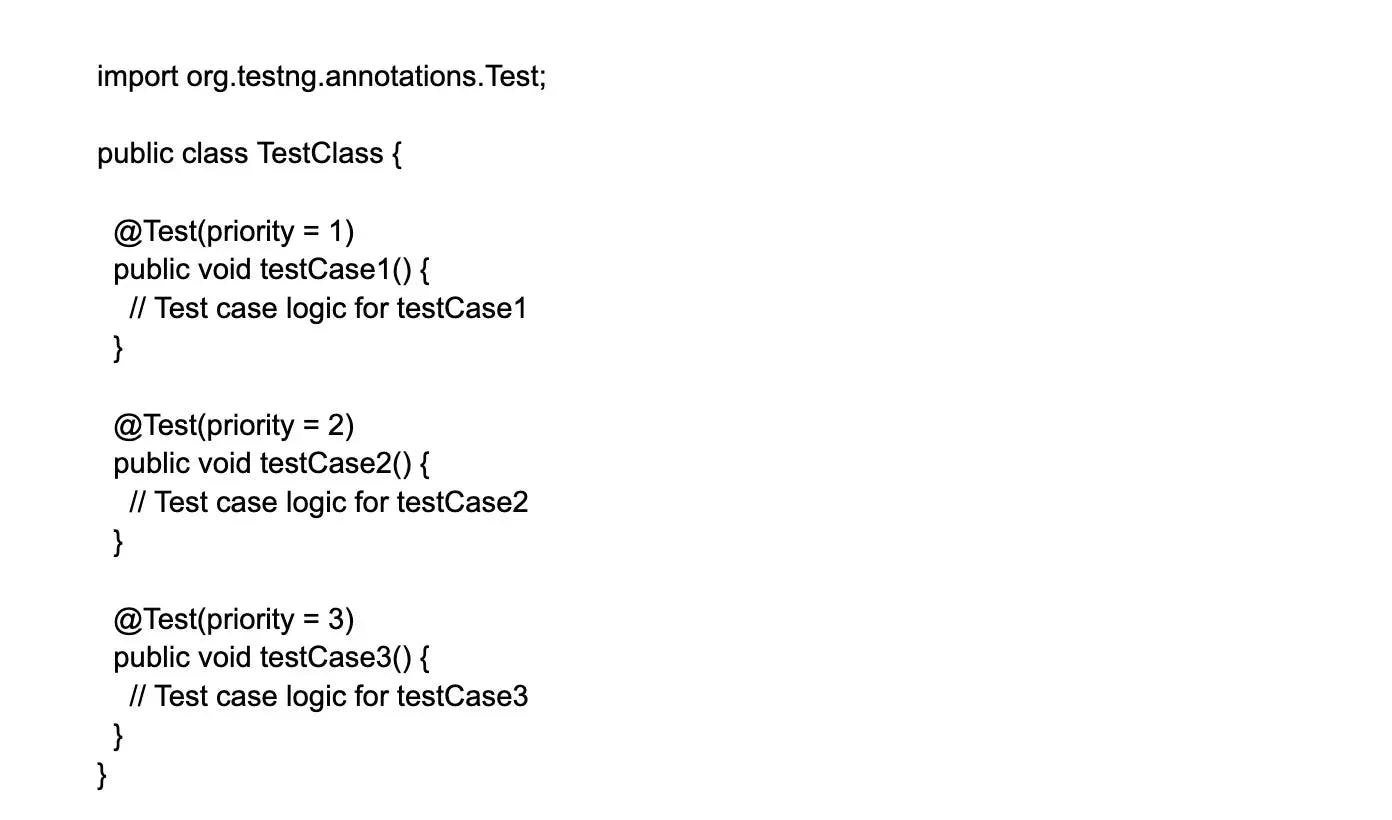
In the above example, the priority attribute is used to assign a priority value to each test case. Test cases with lower priority values will be executed first. Here, testCase1 will be executed before testCase2, and testCase2 will be executed before testCase3.
This way, by setting the priority attribute for each test case, you can control the order in which they are executed during the test run.
27.
What is the default priority of a test method in TestNG?
In TestNG, test methods without a specified priority attribute are not assigned a default priority value like 0. Instead, the order of their execution is determined by reflection API - the order in which Java reflection returns the test methods. After all methods with explicit priority values have been scheduled, methods without priority are executed in the order they're discovered, which may vary with implementation and isn't guaranteed to be consistent. Therefore, if you need a guaranteed execution order, it's better to assign a priority or manage dependencies using the dependsOnMethods attribute.
28.
How to prevent a test case from running using TestNG?
To prevent a test case from running using TestNG in Selenium, you can use the enabled attribute provided by TestNG. Setting the enabled attribute to false will prevent the test case from running.
Here is an example of how you can prevent a test case from running using TestNG:

By setting the enabled attribute to false, the test case testCaseToDisable will not be executed when you run your TestNG suite.
This is a straightforward way to exclude specific test cases from running without the need for any additional references.
29.
How can we run test cases in parallel using TestNG?
To run test cases in parallel using TestNG in Selenium, you can implement TestNG's parallel attribute at multiple levels such as method, class, suite, and XML file. Additionally, you can use TestNG's DataProvider annotation to execute test cases in parallel.
To implement parallel test execution in TestNG with Selenium, here are the basic steps:
- Configure the parallel parameter for the desired level
- Use DataProvider to pass data to multiple test methods
- Specify the number of threads for parallel execution with the thread-count attribute
- Add a synchronized block for thread safety
Tired of interviewing candidates to find the best developers?
Hire top vetted developers within 4 days.
Wrapping up
Preparing well for your Selenium interview means studying a diverse range of topics. By thoroughly reviewing the top 100 Selenium interview questions and answers, you can enhance your chances of acing the interview. Remember, practice makes perfect. Besides studying the interview questions, spend time coding, debugging, and familiarizing yourself with real-world scenarios. The more hands-on experience you gain, the better you will perform in interviews.
Nevertheless, if you aim to bypass this procedure and rapidly hire a Selenium developer, you have the option of selecting Turing to access thoroughly evaluated developers of exceptional caliber. Alternatively, if you are a proficient developer seeking lucrative opportunities, you can explore our Selenium developer positions and swiftly apply to join a leading U.S. corporation.
Hire Silicon Valley-caliber remote Selenium developers at half the cost
Turing helps companies match with top-quality remote Selenium developers from across the world in a matter of days. Scale your engineering team with pre-vetted remote Selenium developers at the push of a button.
Hire Silicon Valley-caliber remote Selenium developers at half the cost